


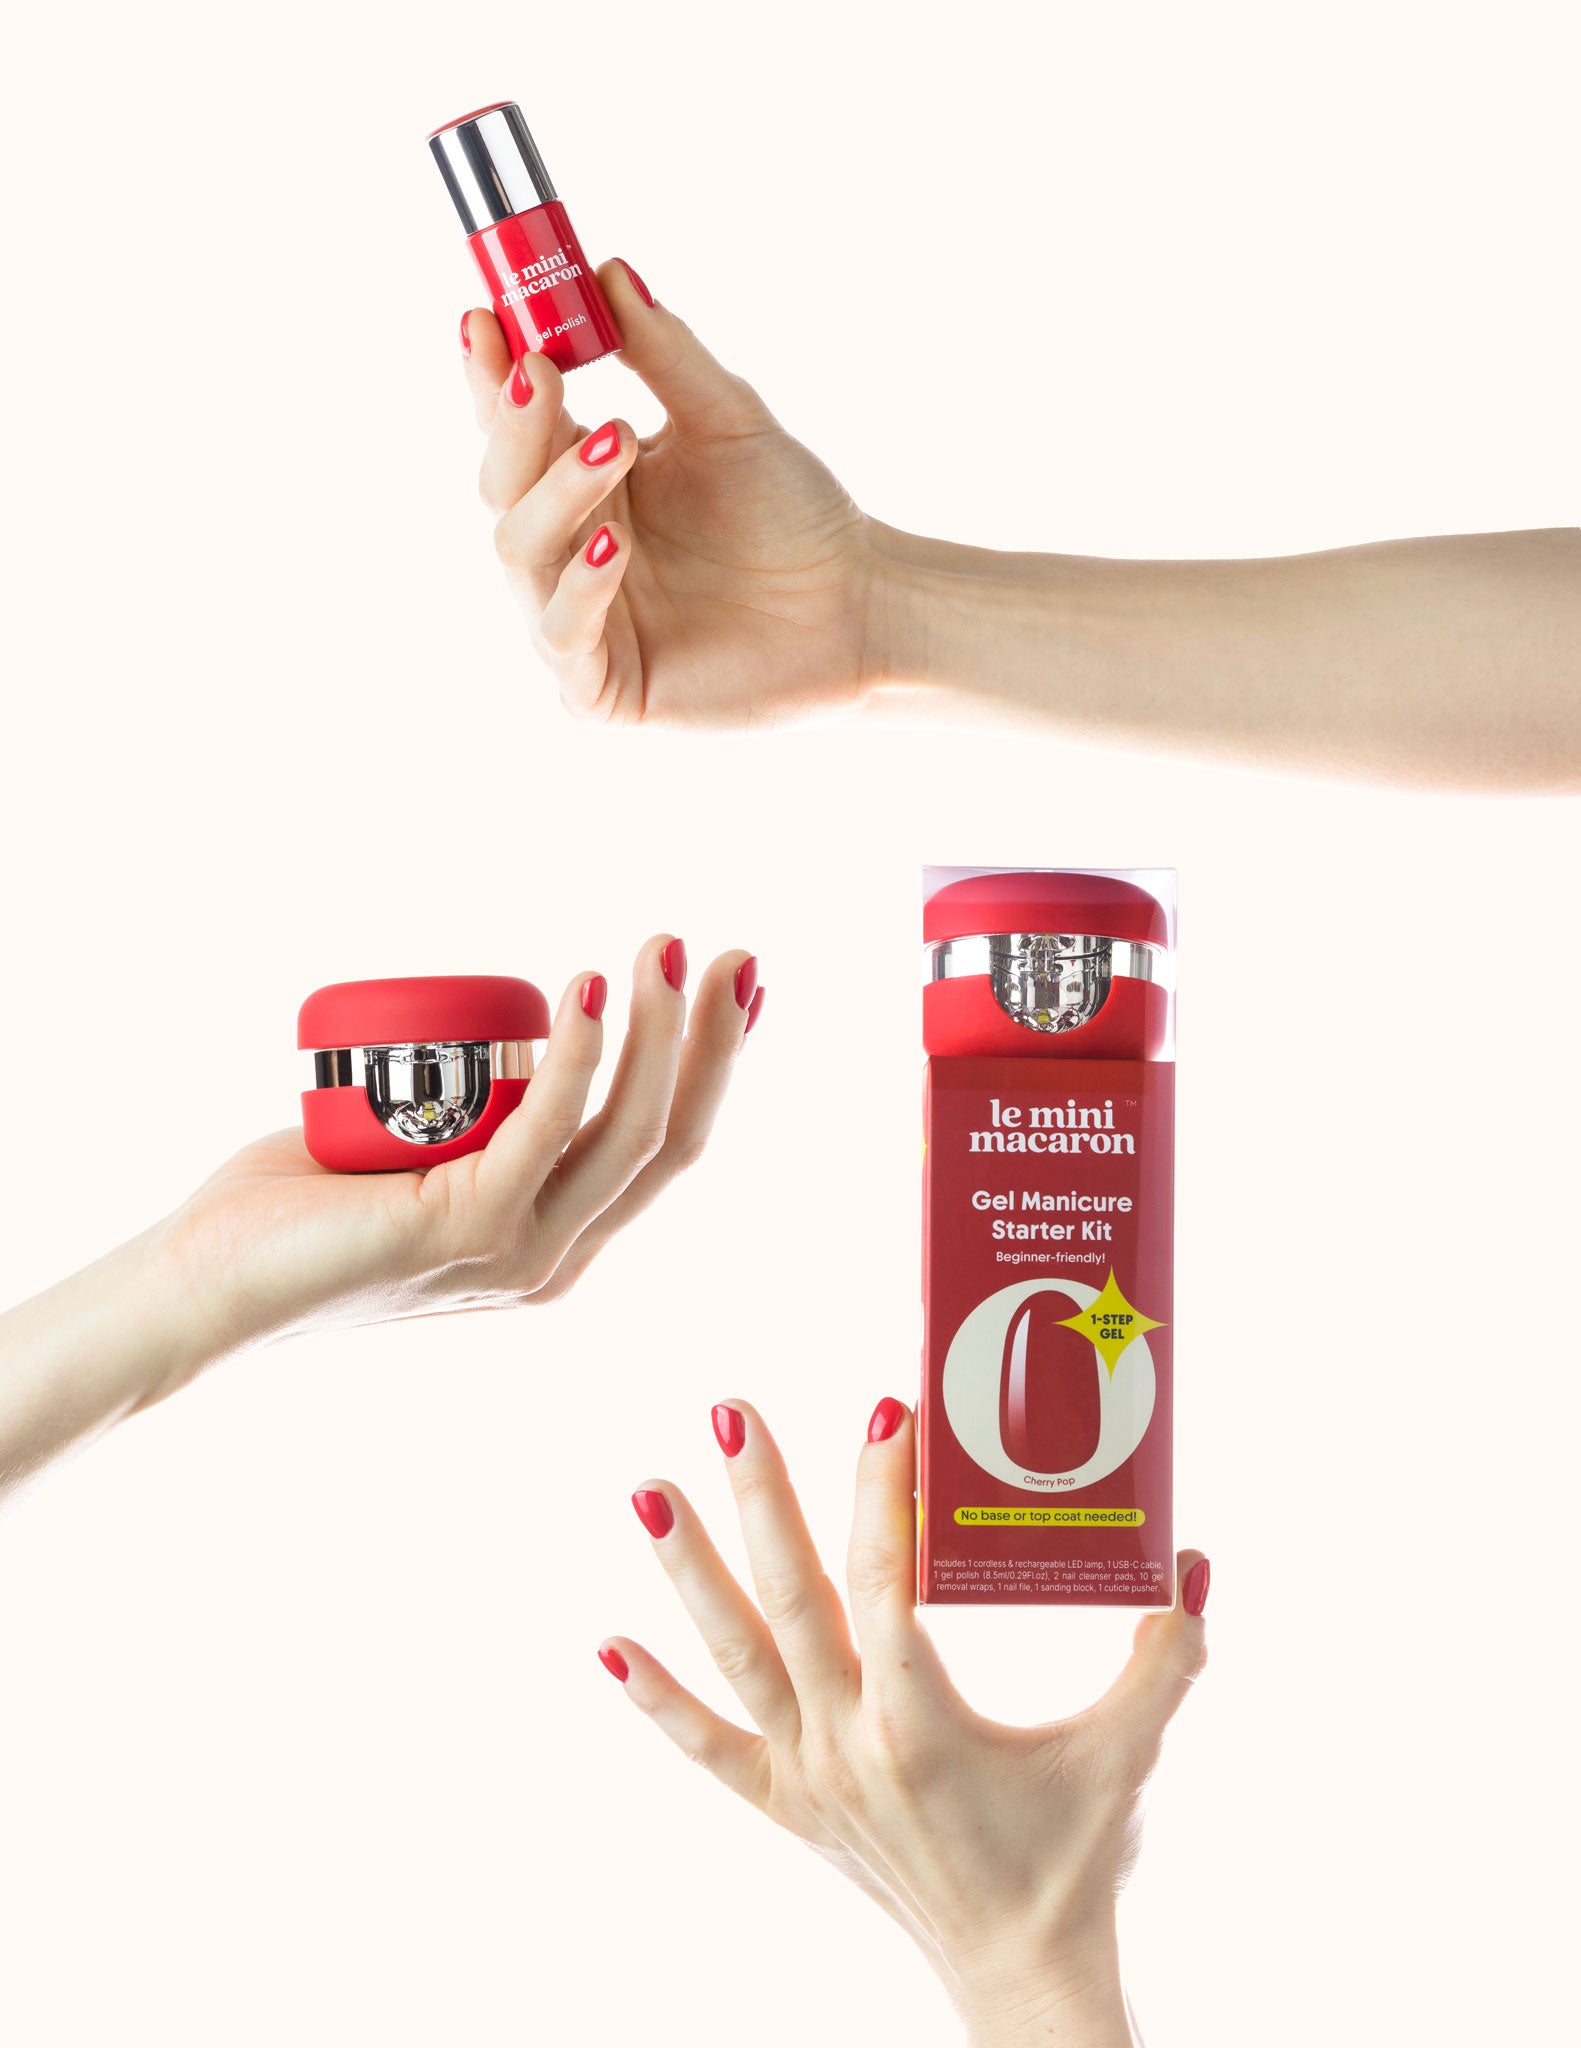
Cherry Pop - Cordless Gel Manicure Kit
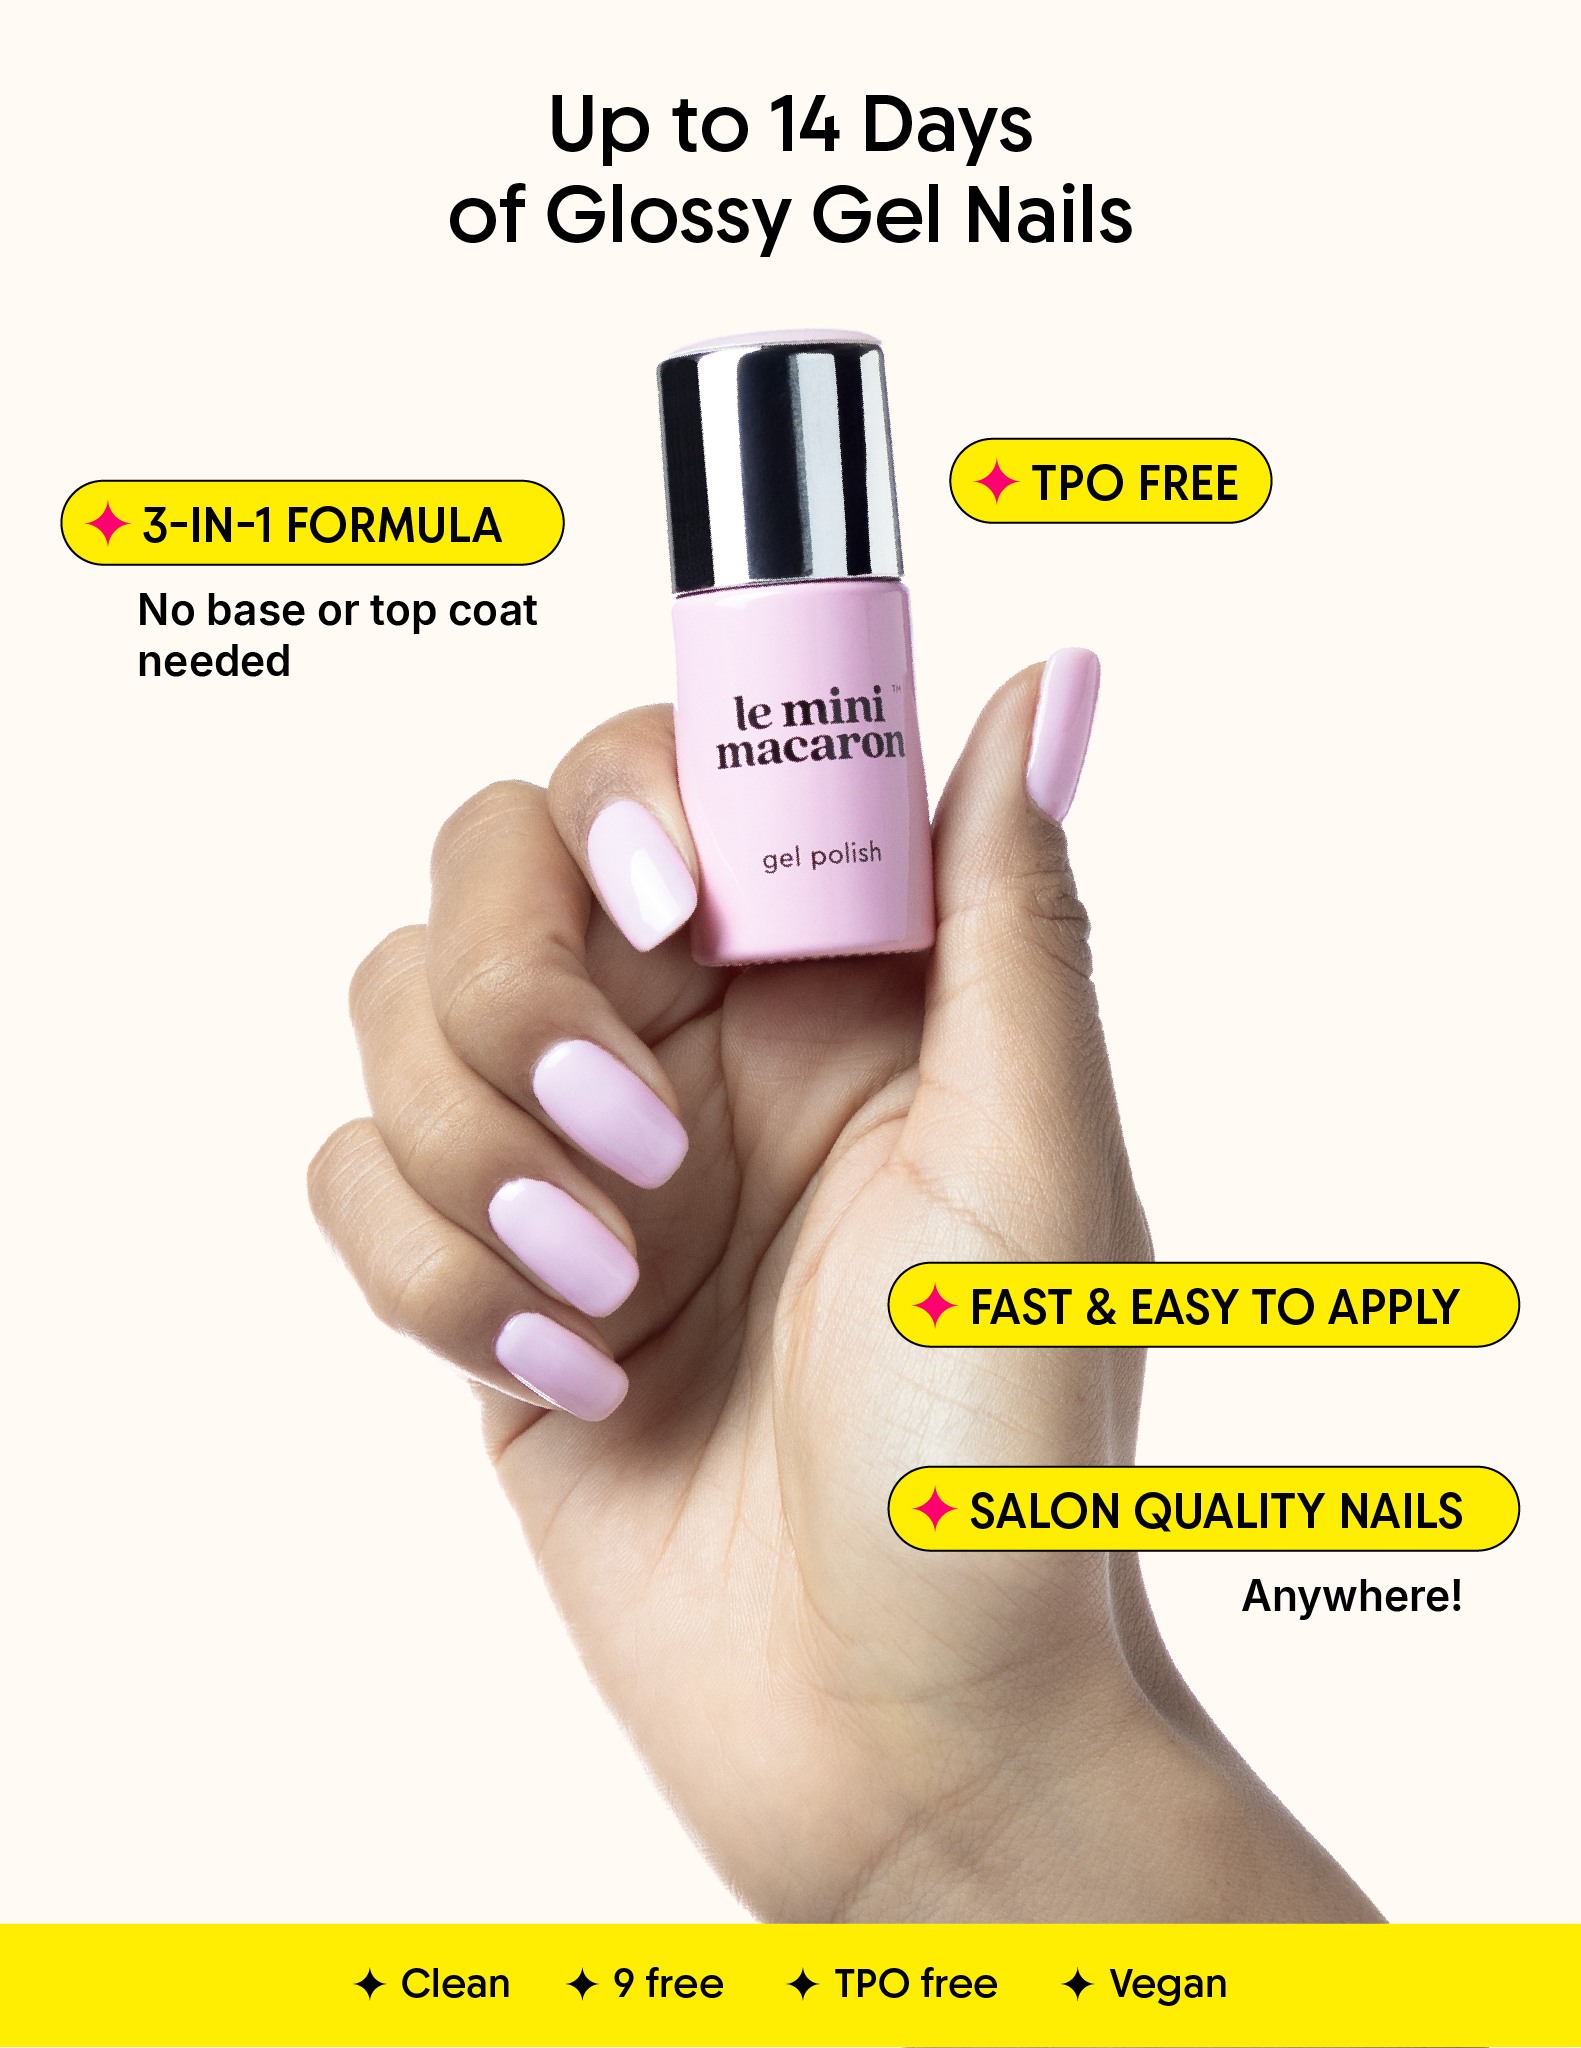
All-in-one gel manicure, made easy | TPO-Free
Get salon-quality gel nails wherever you are with our cordless lamp. No cables, no hassle.
Save time with a fast, easy routine designed for beginners. Everything you need in one kit for glossy, long-lasting results up to 14 days.
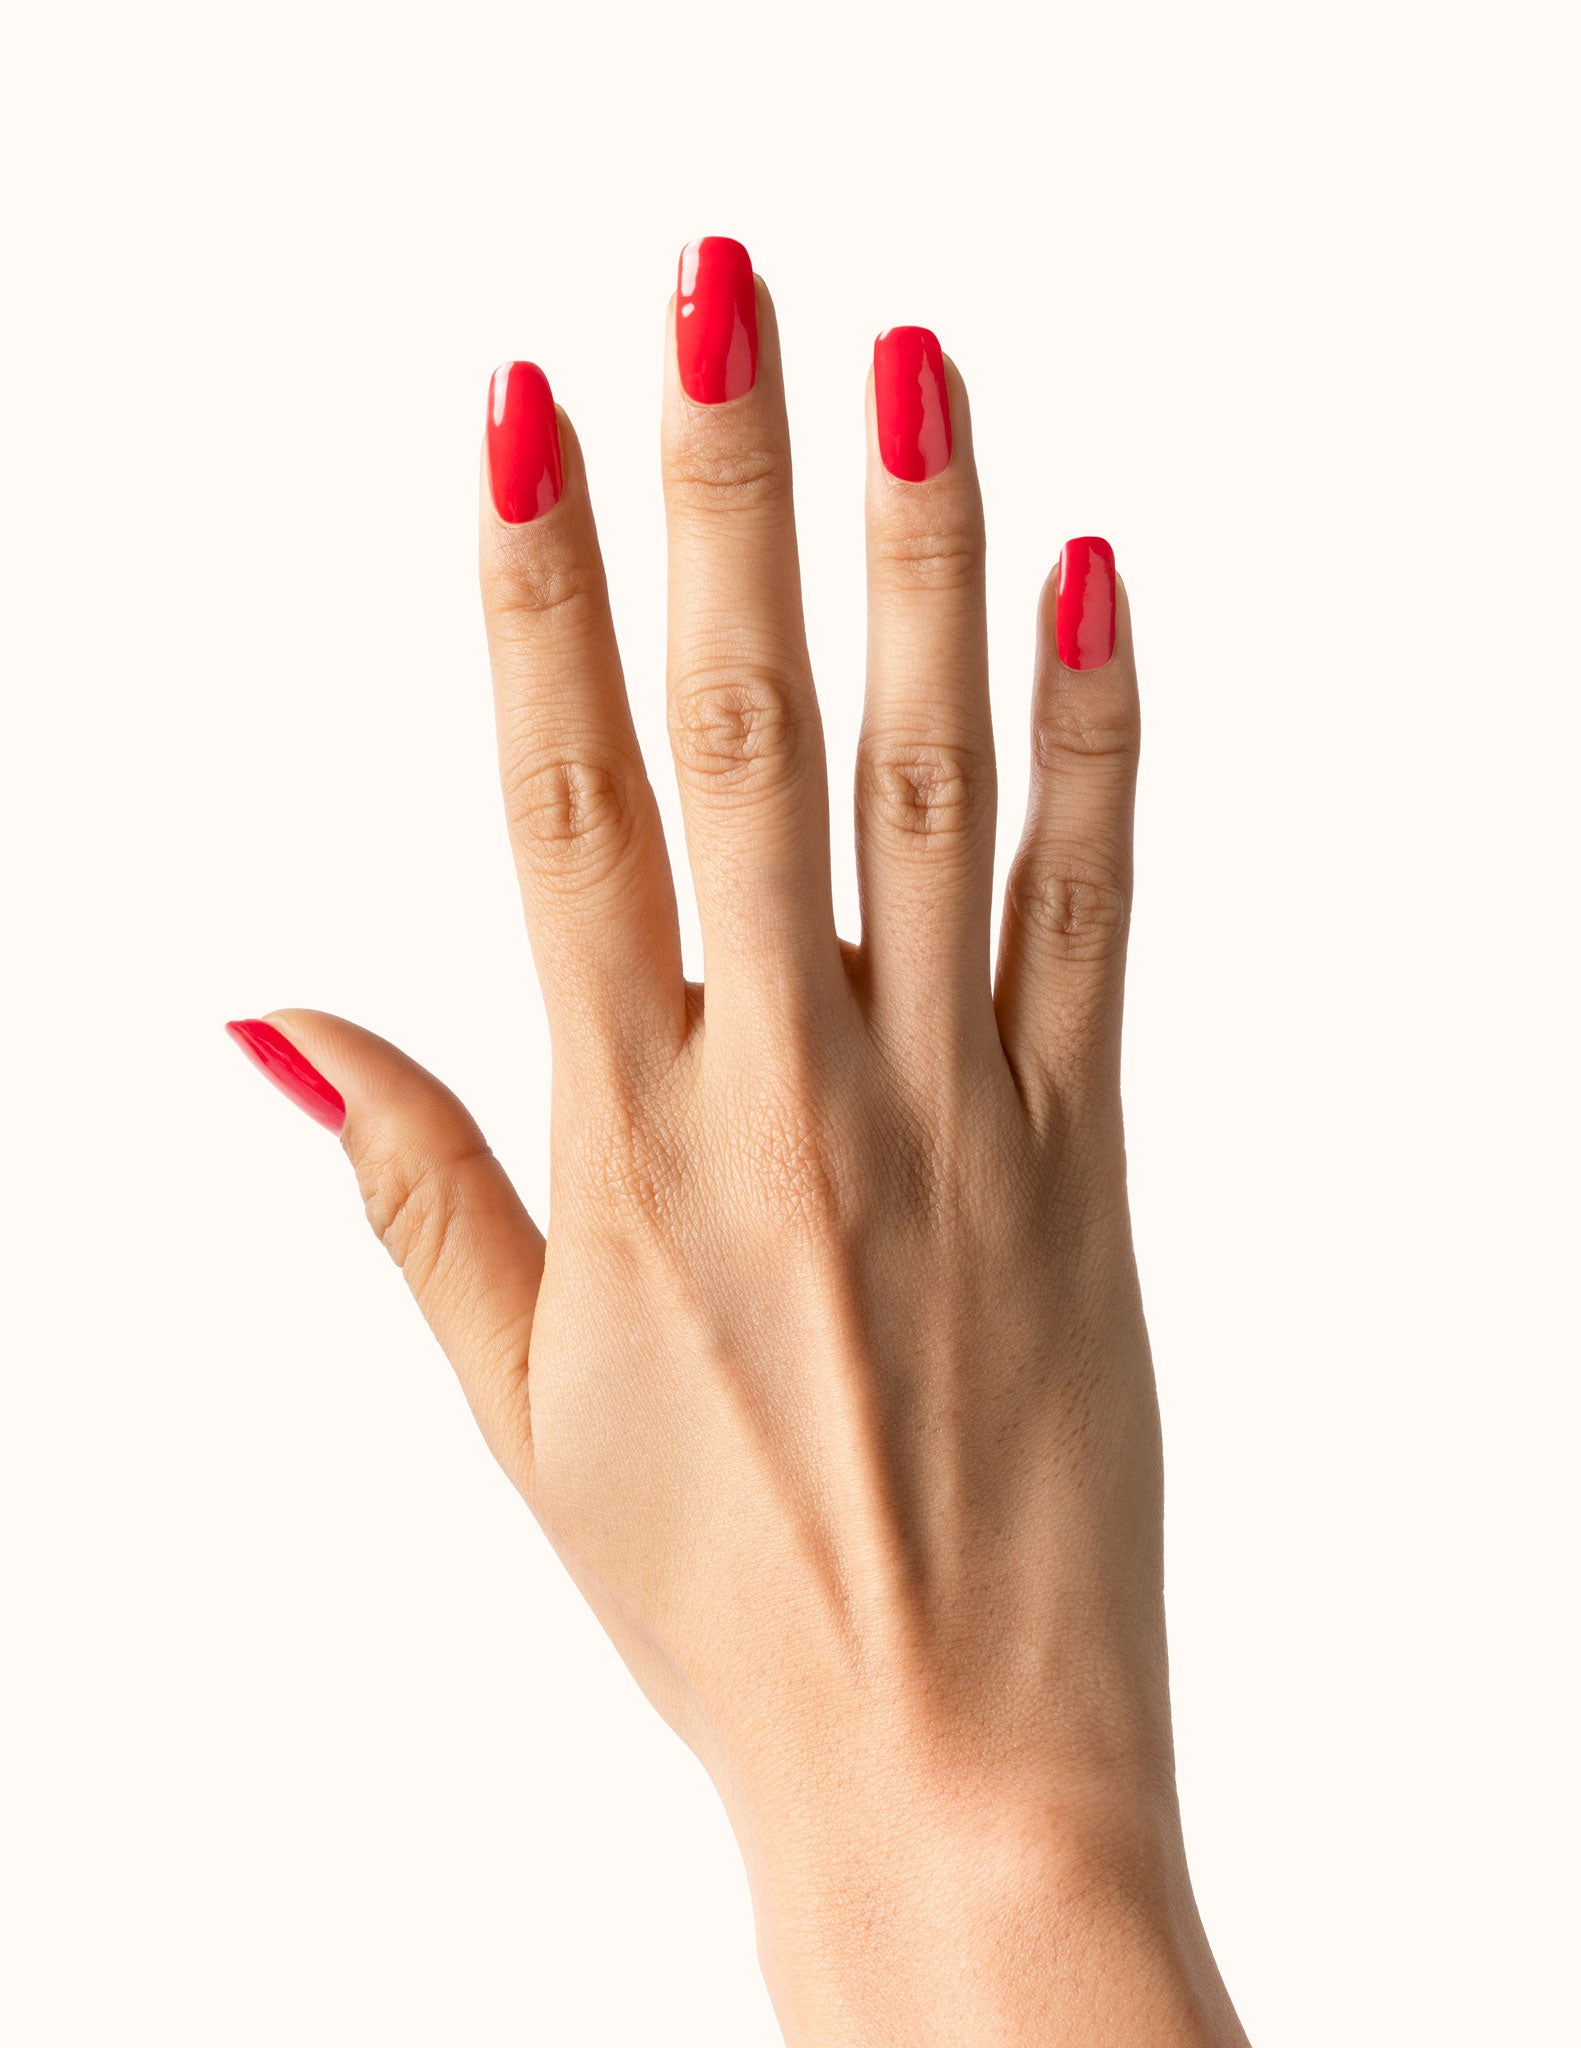
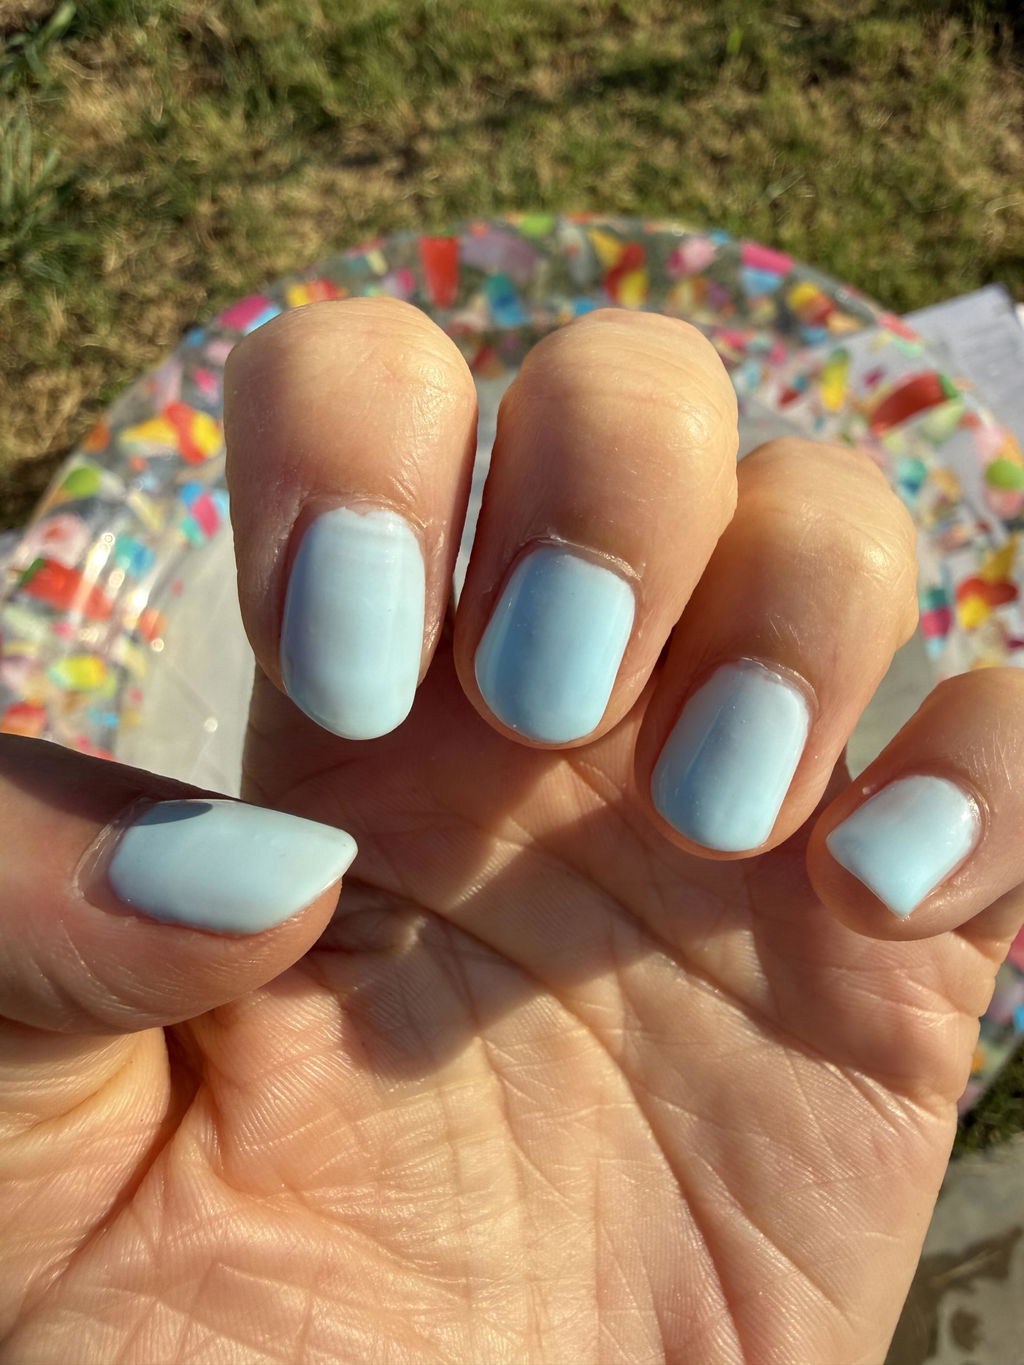
Cherry Pop: A rich true red, iconic yet never boring, made for timeless manis.
Fast & Easy | TPO-Free & 9-Free | Salon quality


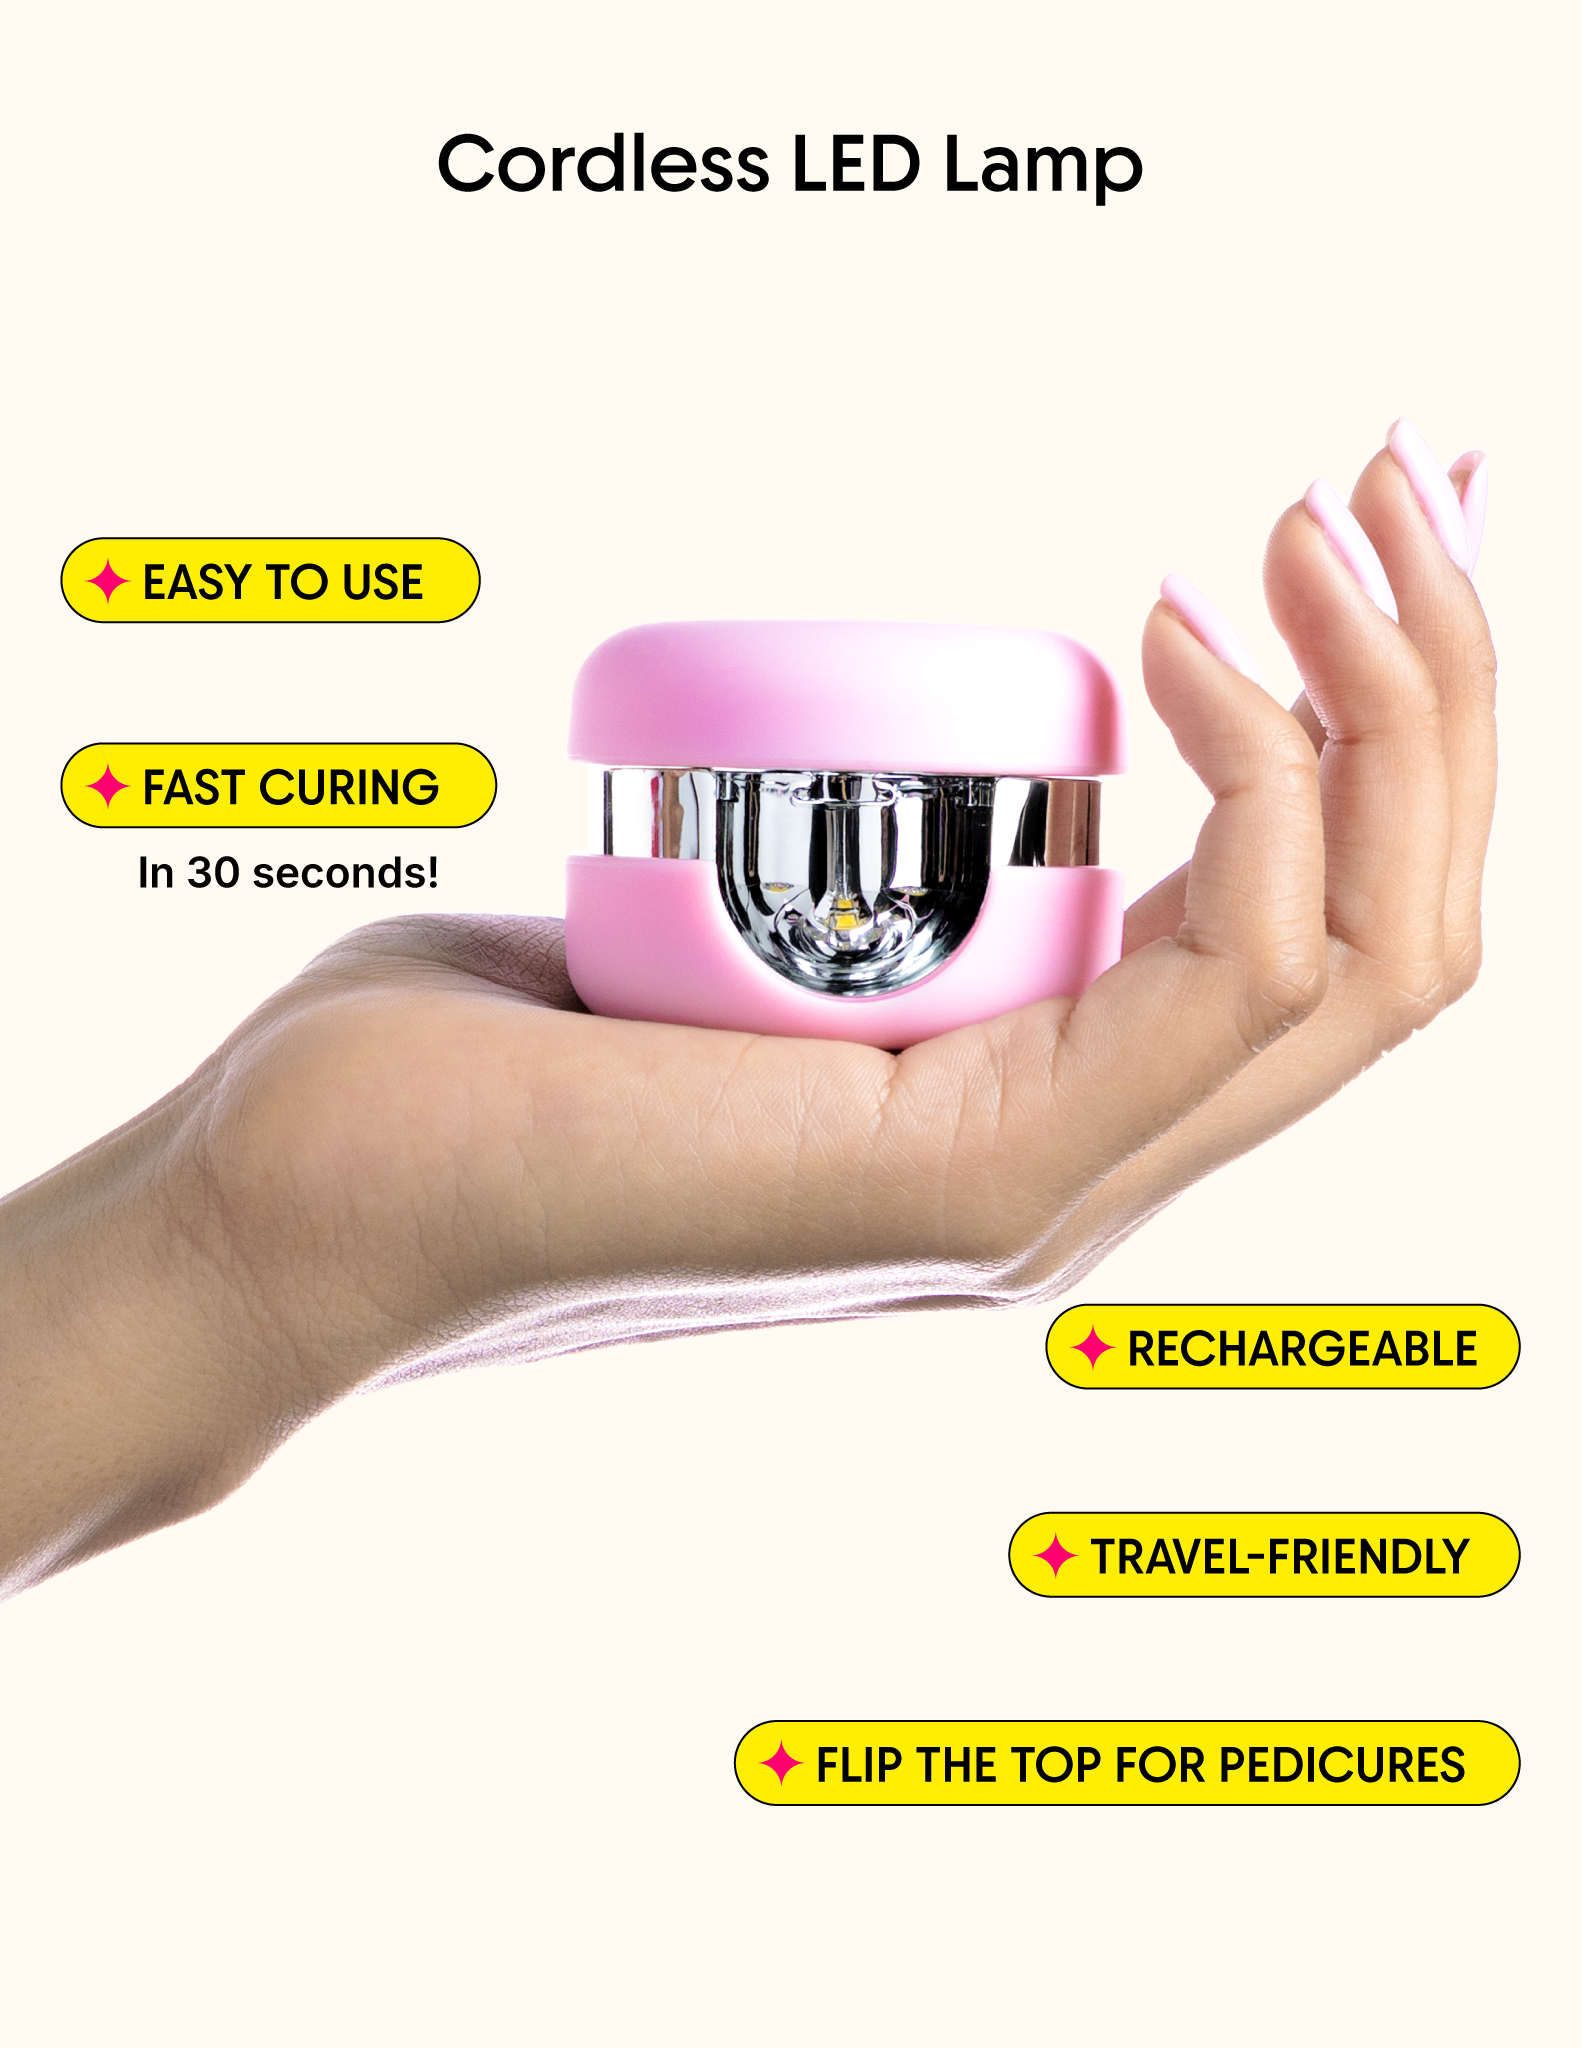
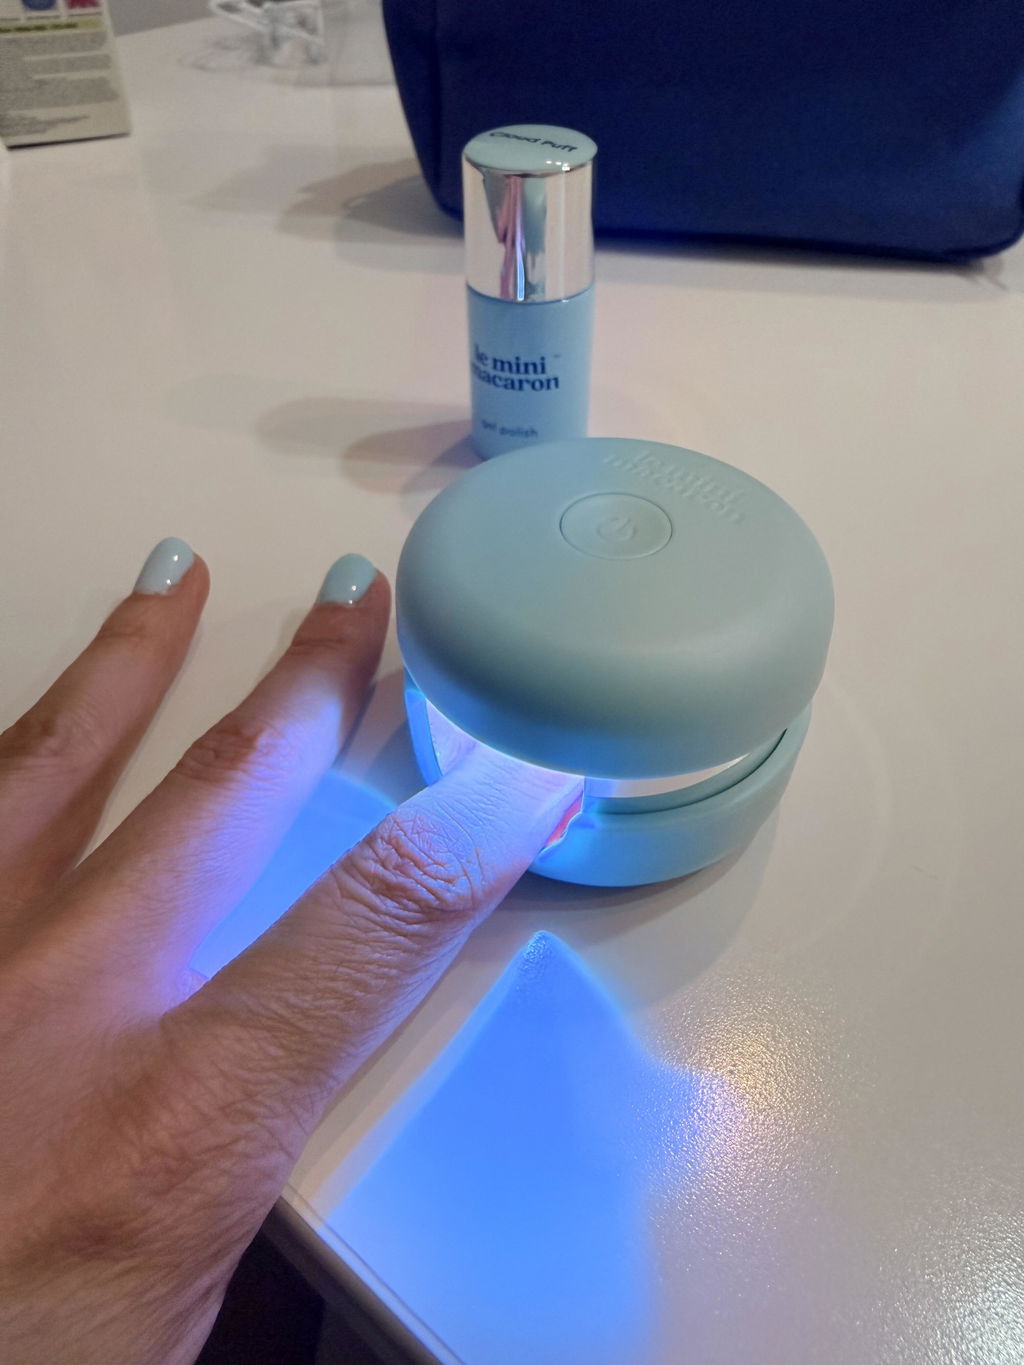
CORDLESS LAMP
CORDLESS LAMP
CORDLESS LAMP
ONLINE EXCLUSIVE
CORDLESS LAMP
Pairs Best With:

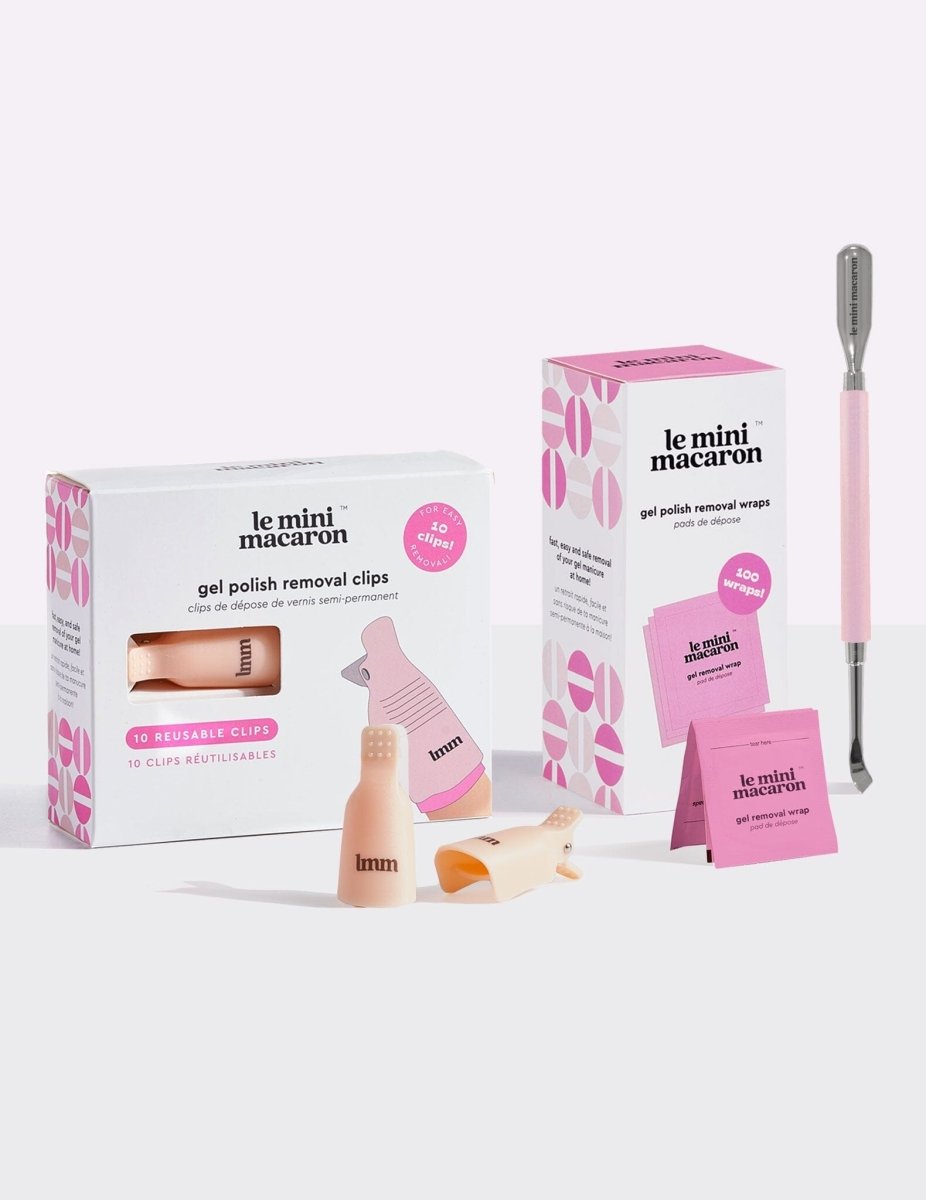
Gel Polish Remover Wraps
11.90 € 14 €
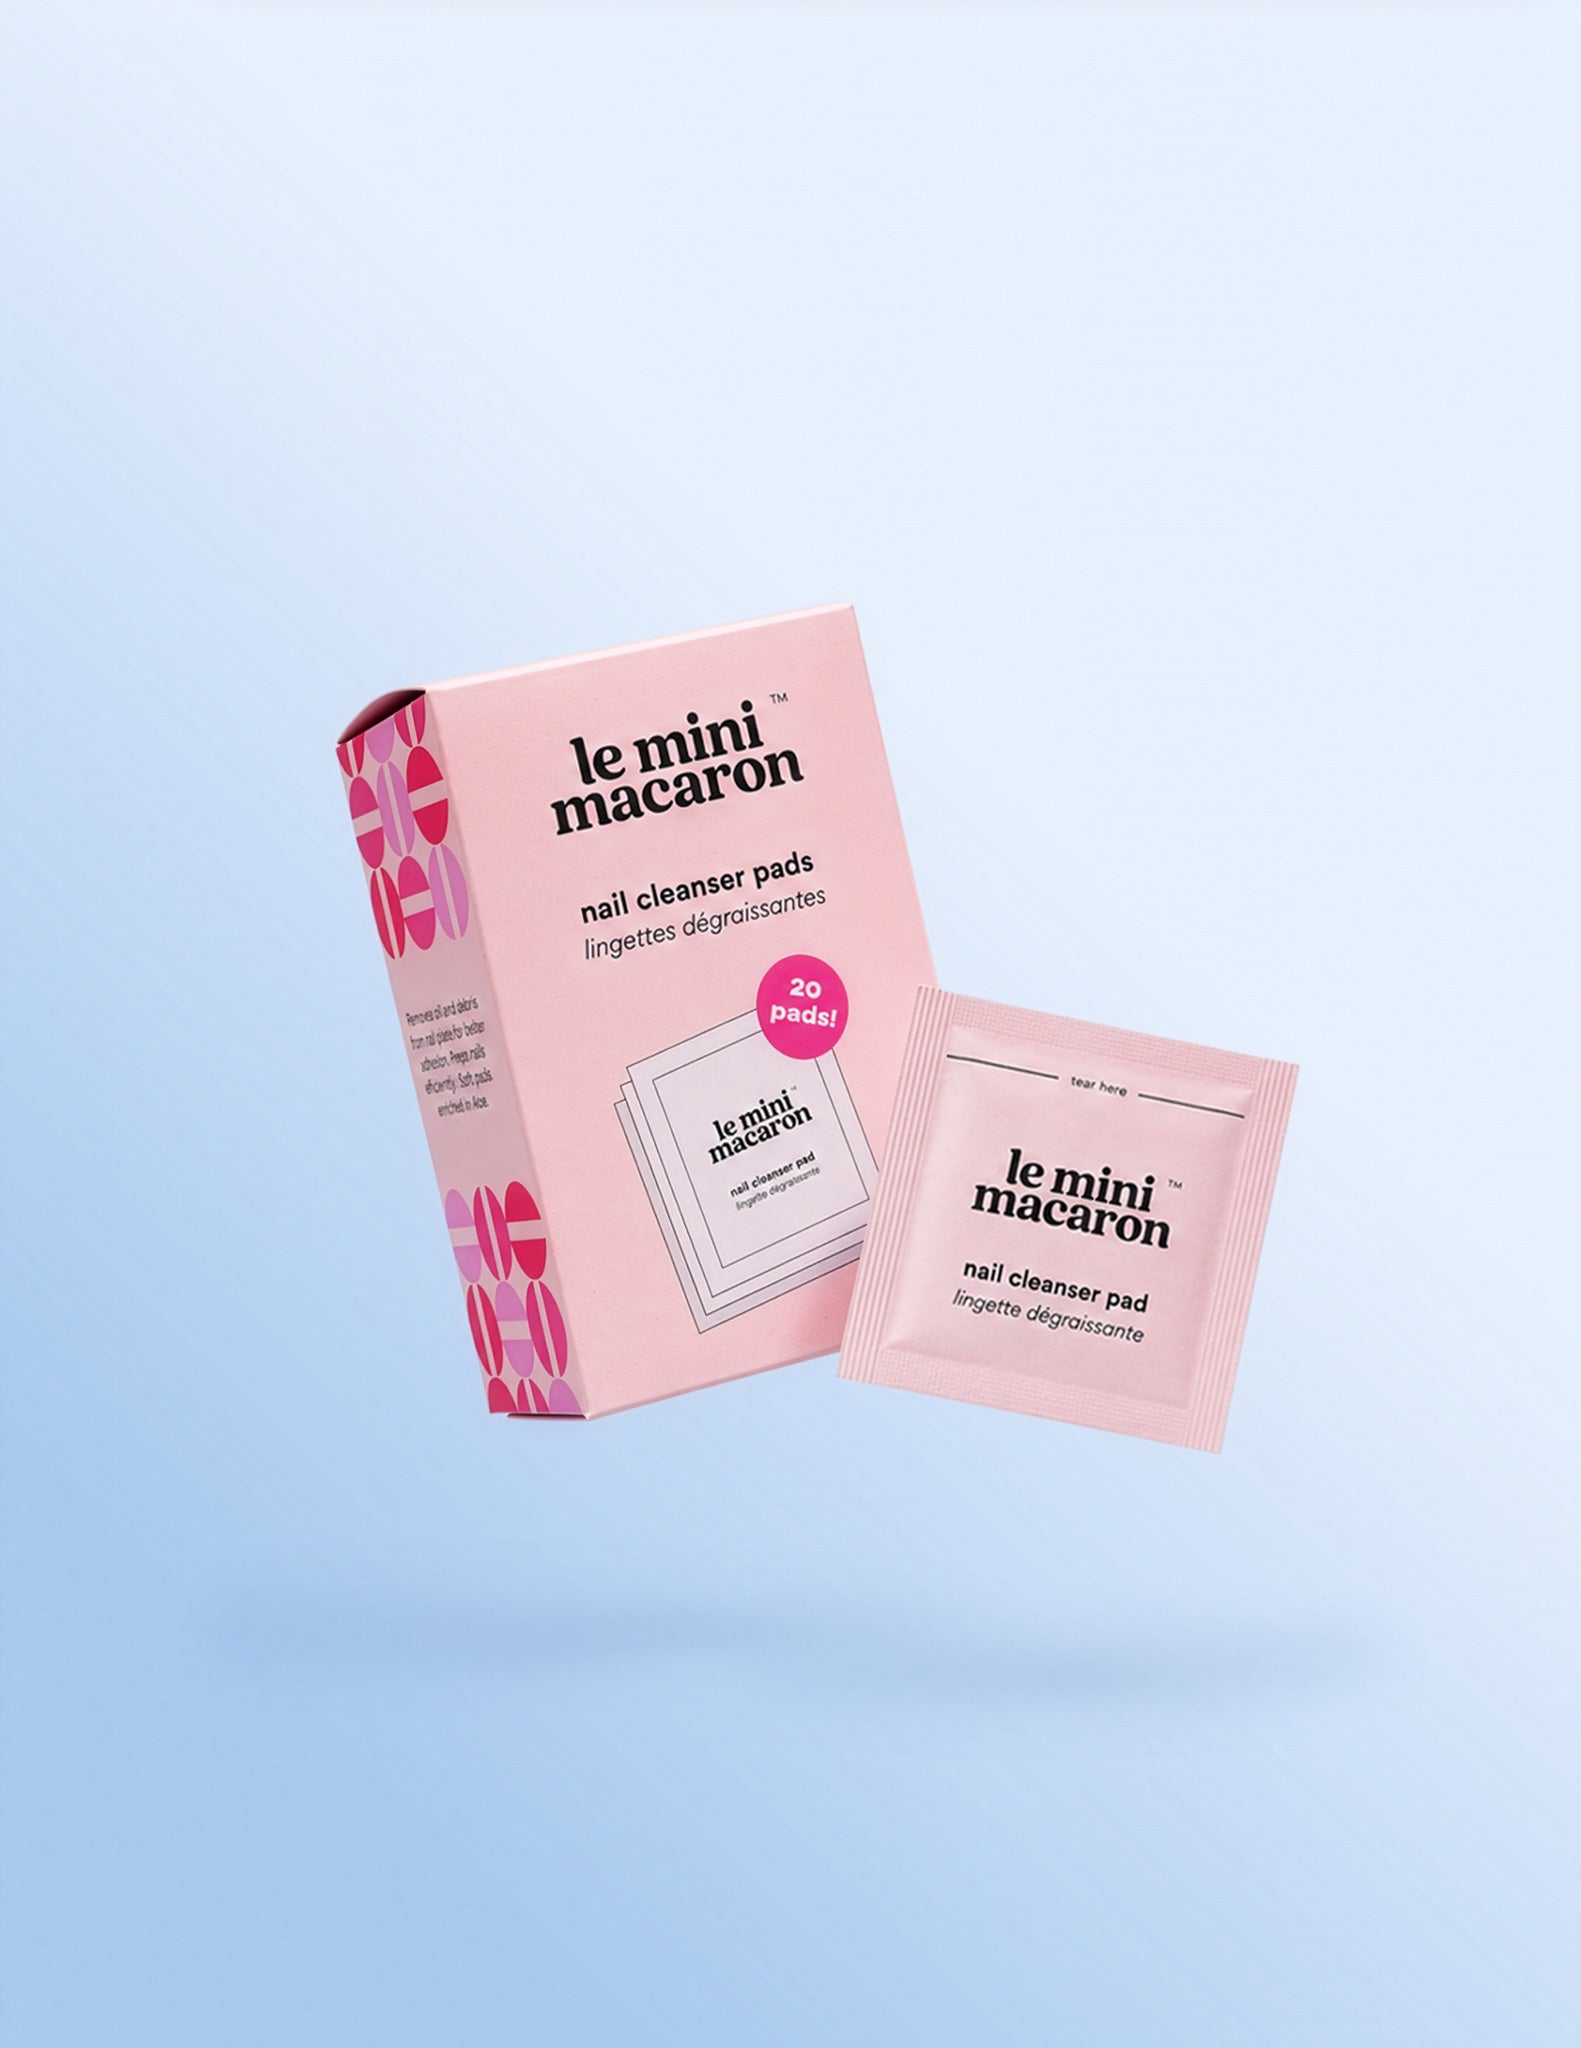
Nail Cleanser Prep Pads
4.25 € 5 €
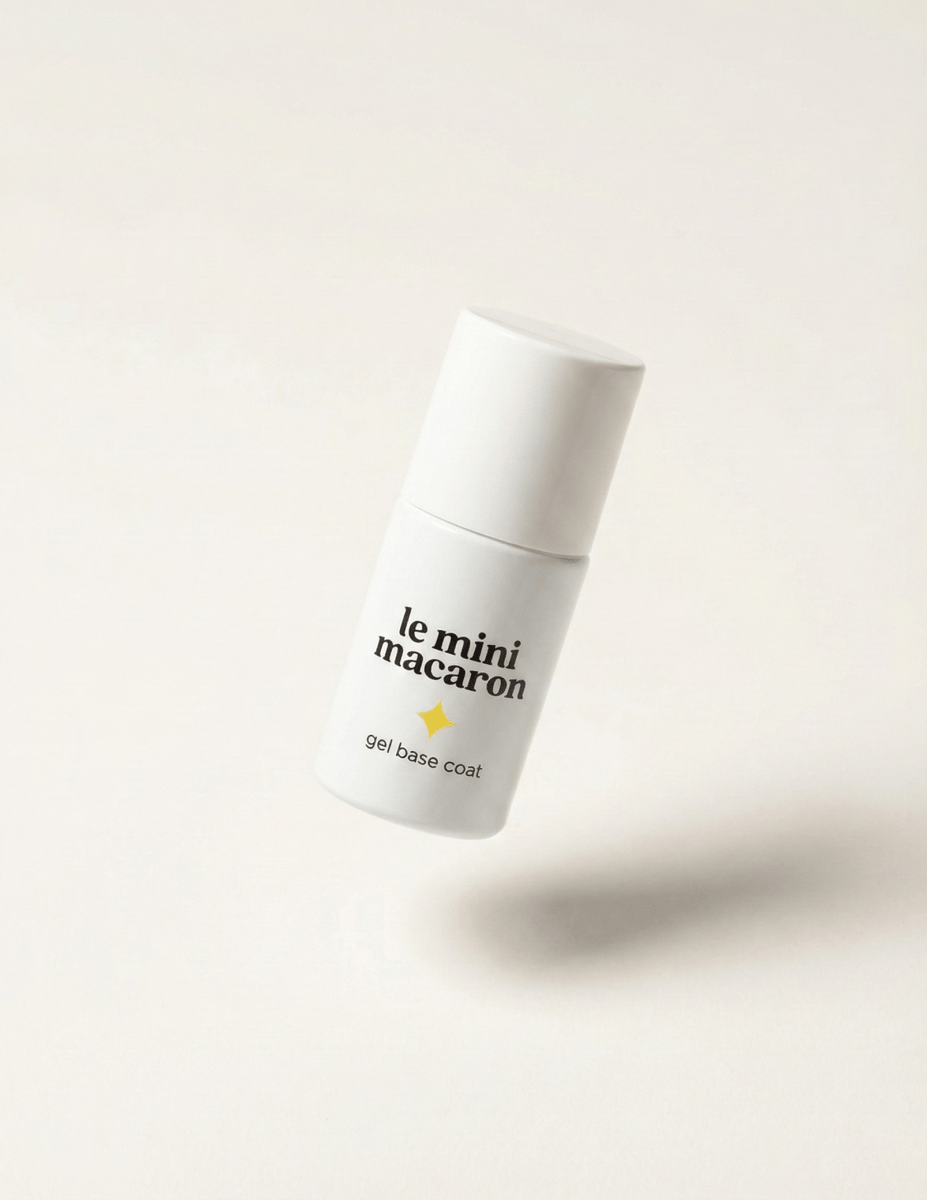
Gel Base Coat
14 €
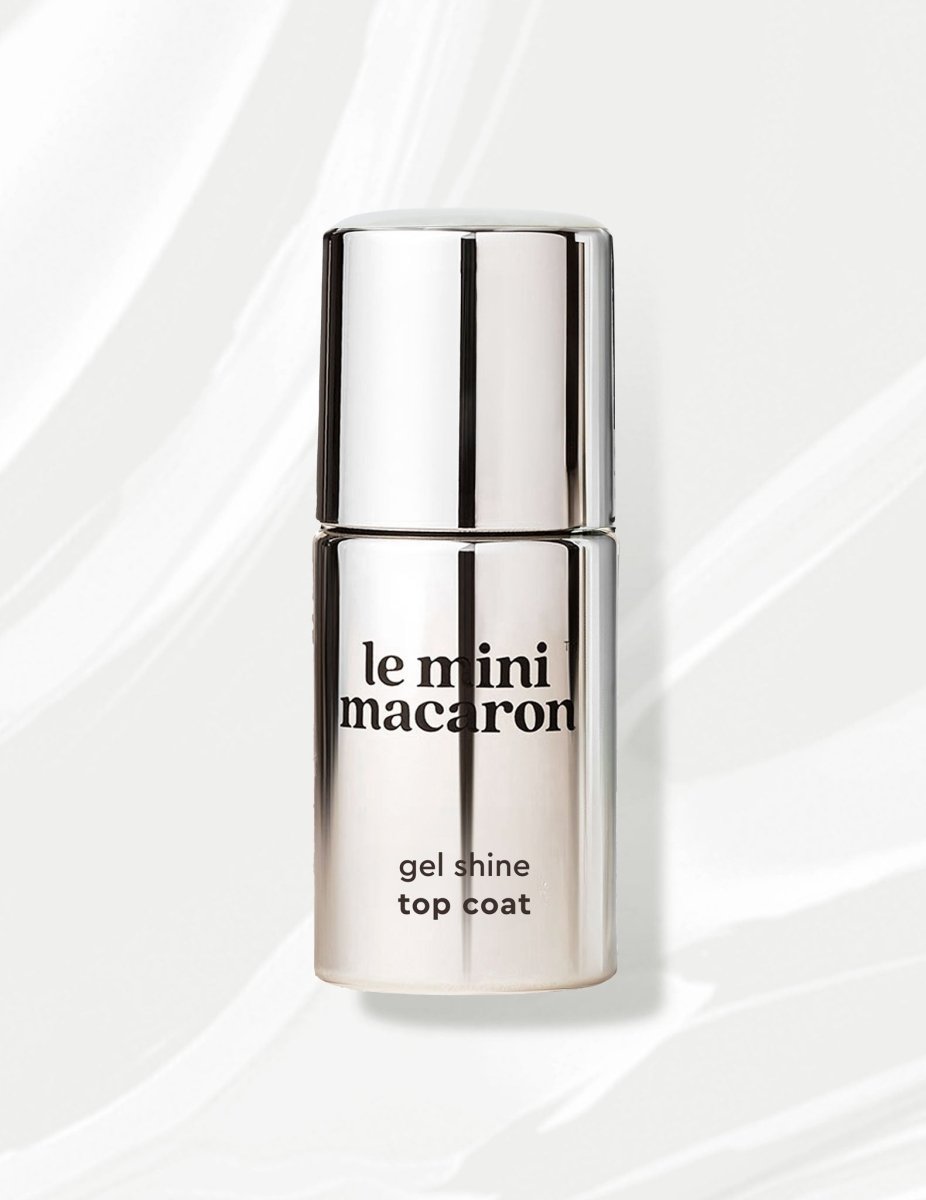
Gel Shine - Top Coat
15 €
Removal Bundle
26.40 € 33 €
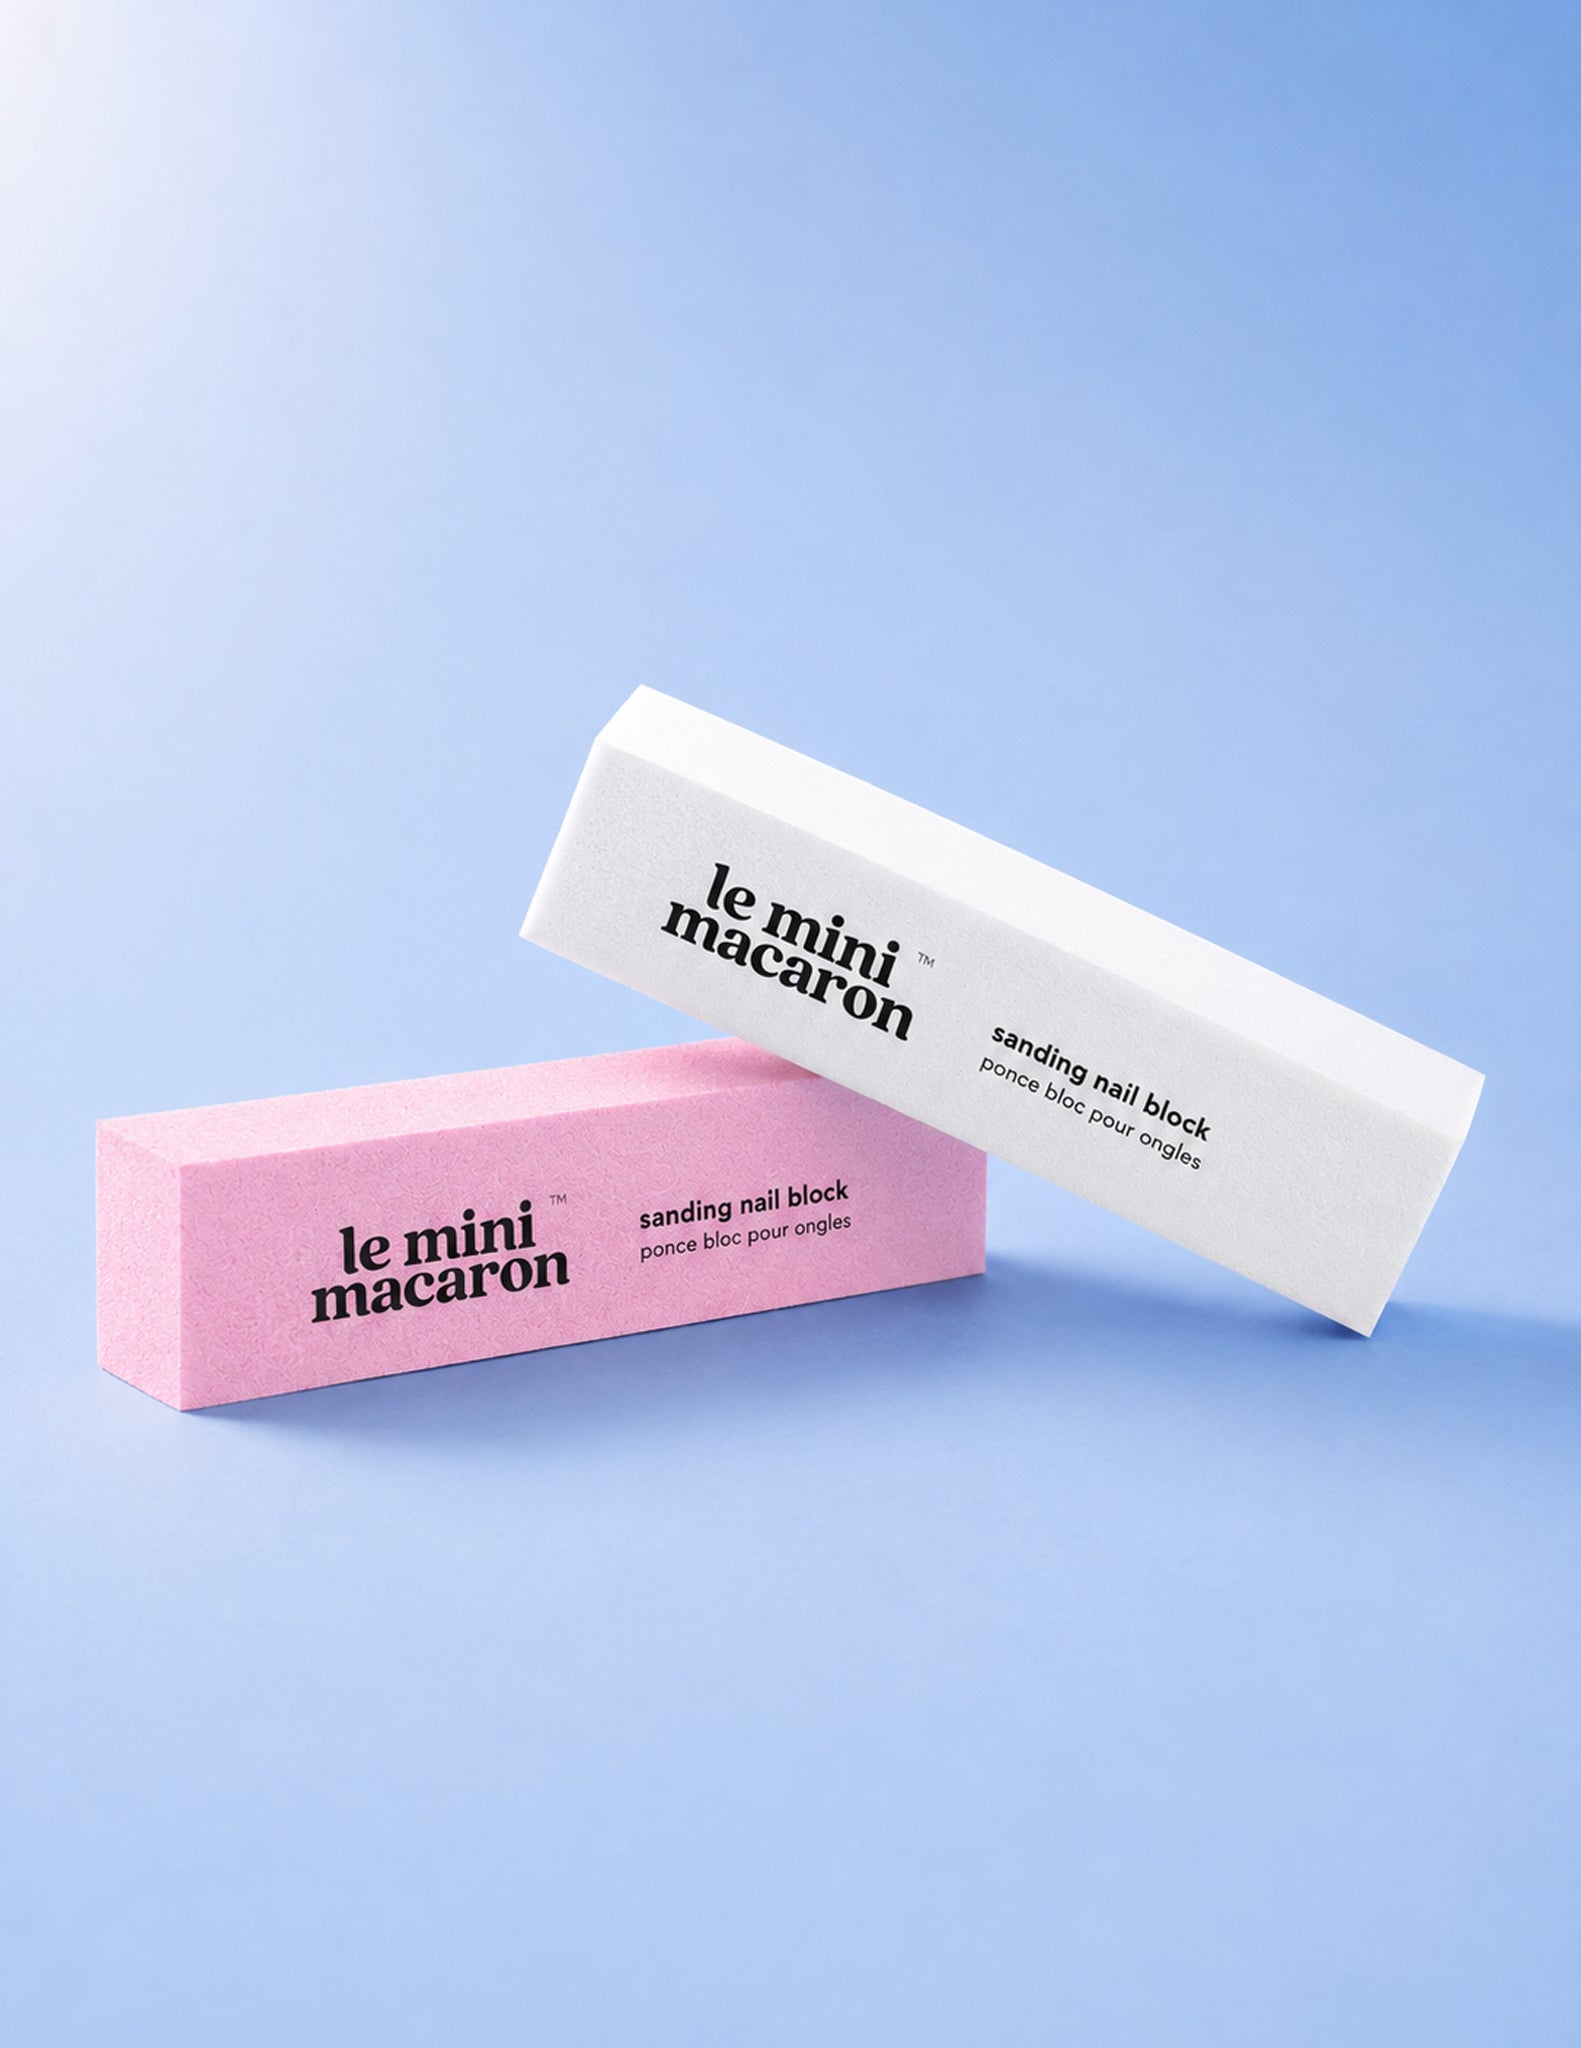
Sanding Block
2.51 € 2.95 €

Long-wear Gel Trio Bundle
28.99 € 37 €
Why You’ll Love It
- All-in-one kit, everything you need for your gel mani, in one box.
- 3-in-1 gel formula, base coat, color & top coat.
- Beginner-friendly, easy to apply even if it's your very first gel mani.
- Glossy gel results that last up to 14 days, chip-free & salon-worthy.
- 30-second cure per nail, fast & precise curing with the one-finger LED lamp.
- Compact & portable, fits in your bag, use it anywhere.
- Works for manis and pedis.
- Vegan, Cruelty-Free, TPO Free & 9-Free
Each Kit Includes:
- Cordless LED Lamp & USB-C Charging Cord
- 3-in-1 Gel Polish
- 2x Nail Cleanser Pads
- 10x Gel Removal Wraps
- Mini Nail File
- Cuticle Pusher
- Sanding Block
Choose options
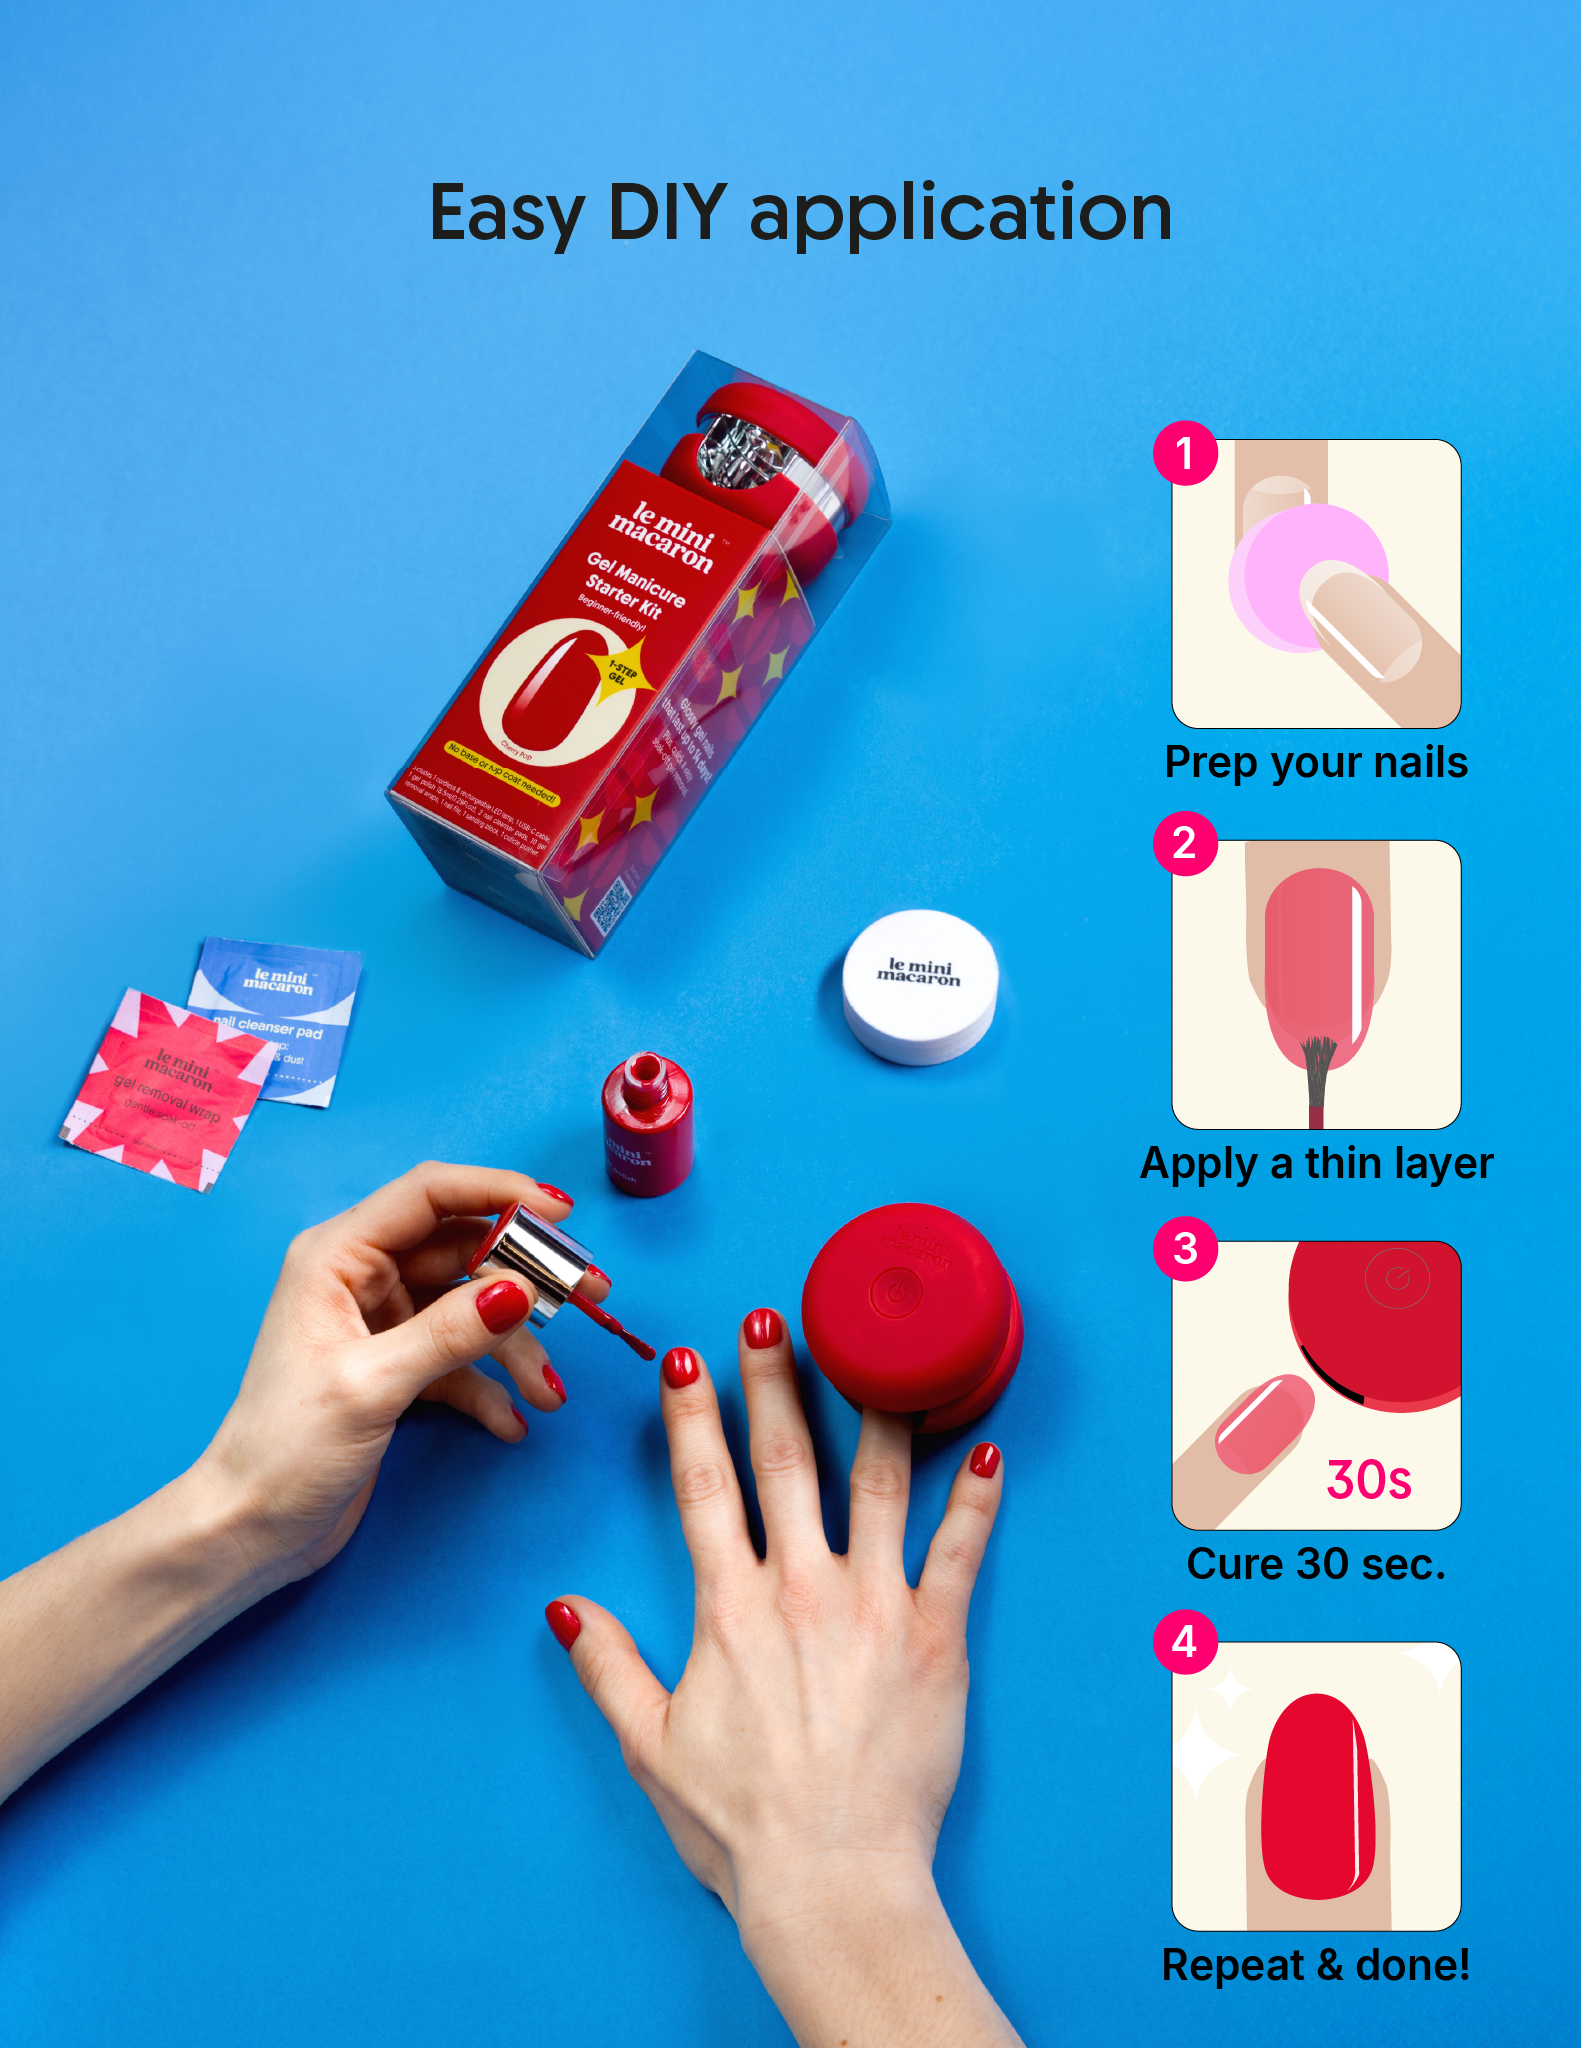
How to Apply
Follow these easy directions for a perfect manicure:
NAIL PREP
The foundation of every great mani.
- File nails to smooth edges.
- Push back cuticles gently.
- Buff nails until the surface looks matte.
- Brush off dust and wipe nails with cleanser.
Avoid touching anything after cleaning to keep nails free of oils!
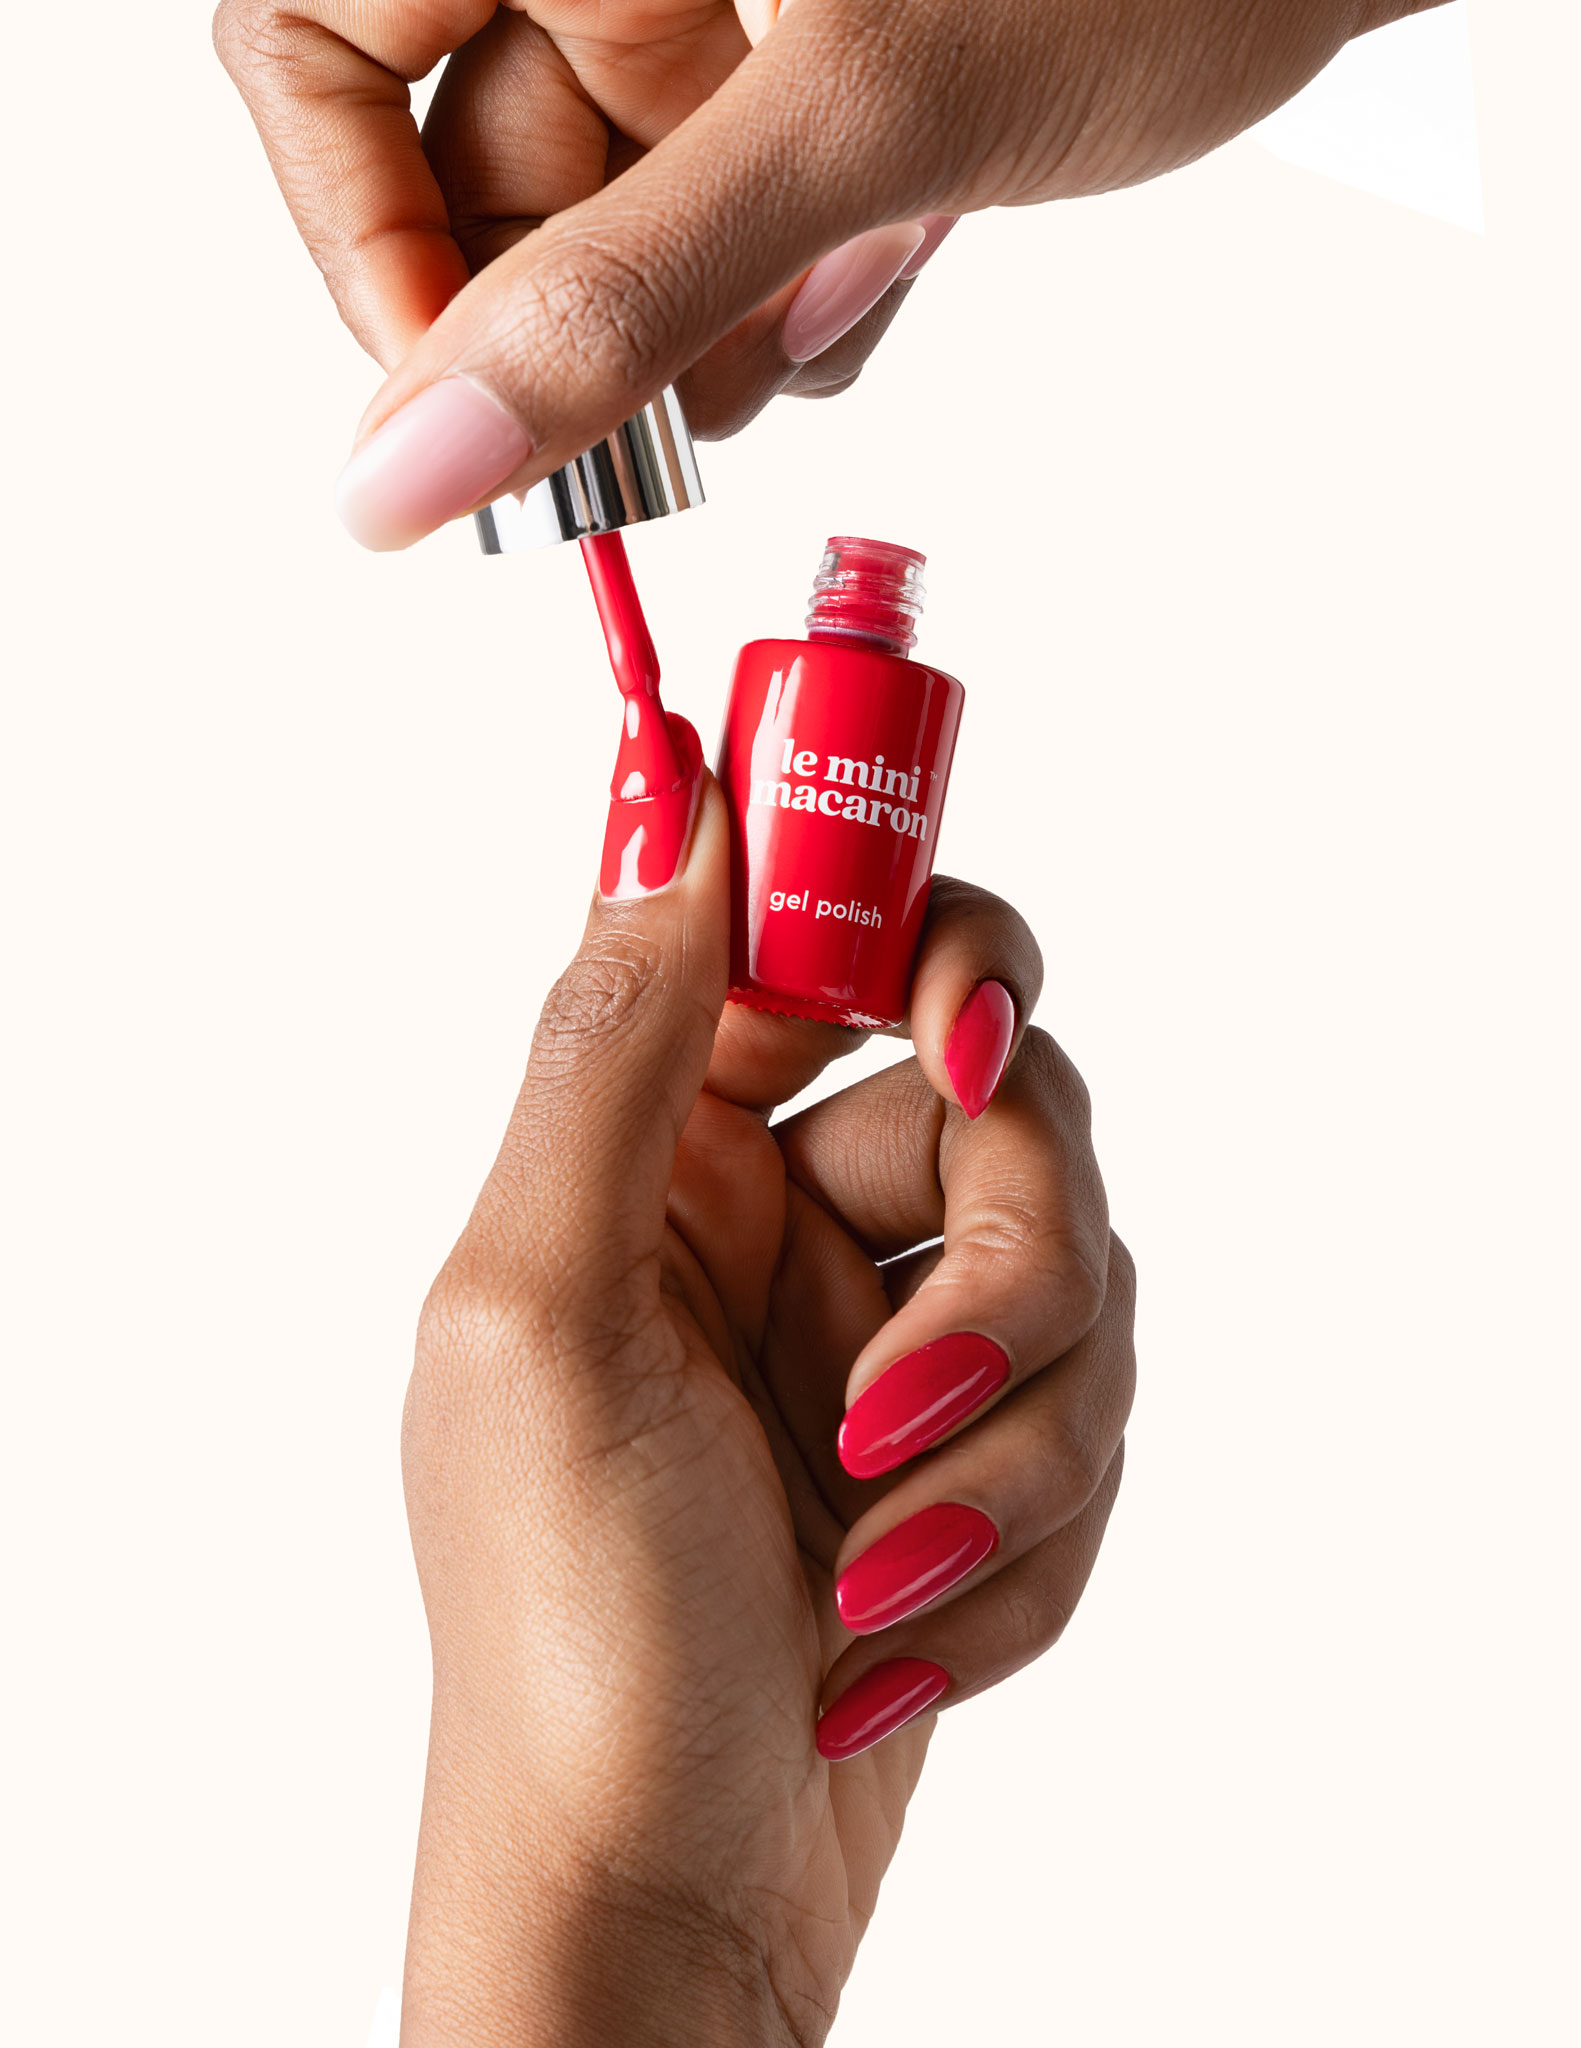
APPLY GEL POLISH
Shake the gel polish bottle well.
- Apply first coat – thin, almost transparent and seal the edges.
- Cure in lamp – 30 seconds.
- Apply second coat – Slightly thicker coat. Seal the edges.
- Cure in lamp – 30 seconds.
PRO TIPS
- For an extra glossy finish, apply Top Coat.
- Keep your nails happy—apply cuticle oil and moisturize!
How to Apply
Follow these easy directions for a perfect manicure:
NAIL PREP
The foundation of every great mani.
- File nails to smooth edges.
- Push back cuticles gently.
- Buff nails until the surface looks matte.
- Brush off dust and wipe nails with cleanser.
Avoid touching anything after cleaning to keep nails free of oils!
APPLY GEL POLISH
Shake the gel polish bottle well.
- Apply first coat – thin, almost transparent and seal the edges.
- Cure in lamp – 30 seconds.
- Apply second coat – Slightly thicker coat. Seal the edges.
- Cure in lamp – 30 seconds.
PRO TIPS
- For an extra glossy finish, apply Top Coat.
- Keep your nails happy—apply cuticle oil and moisturize!
How to Remove
Follow these easy directions for perfect removal:
FILE THE TOP LAYER
- Use a 150/180 grit file – until nail looks completely matte.
APPLY REMOVAL WRAPS
- Insert finger into wrap – ensure cotton pad covers top of nail.
- Wrap tightly around finger
- Wait 15 minutes – then remove wrap.
- Polish should be shattered or bubbled – ready to be removed.
GENTLY REMOVE GEL
- Use a cuticle pusher or removal tool – gently scrape off the softened gel.
- Scrape in one direction – from cuticle to free edge of nail.
BUFF NAILS
Smooth out any remaining residue – use a buffer.
Lamp Instructions
- To charge the lamp, connect the power cord to the back of the lamp and plug into a power source (preferably an adaptor). The indicator light on top of the lamp will flash to confirm it is charging.
- After approximately 45min, the battery will be fully charged and the indicator light will remain put. It is recommended to charge it fully before first use.
- A full battery allows for ≤ 30min of continuous use.
- When the lamp is out of battery, the indicator light will flash 5 times.
Power on/off:
- To start the lamp, press the power button situated on top.
- The lamp stops automatically after 30 seconds (1 curing cycle). You can also press the power button to turn it off.
Additional tips: For first-time use, we recommend fully charging the lamp before using it to ensure optimal performance.
Ingredients
Ingredients: Acrylates Copolymer, Hydroxypropyl methacrylate, Pentaerythrityl tetramercaptopropionate, Trimethylbenzoyl ditolylphosphine oxide, Silica.
May contain (+/-): Pigment Black 11 (CI 77499), Pigment Red 57 (CI 15850), Acid Red 33 (CI 17200), Food Yellow 3 (CI 15985), Pigment Blue 27 (CI 77510), Pigment Green 18 (CI 77289), Pigment Violet 16 (CI 77742), Pigment Yellow 42 (CI 77492), Pigment White 6 (CI 77891), Shimmer Bronze SunCROMA™ Brown Iron Oxide Mixture (CI 77019, CI 77491).
TPO Free & 9-Free.

Cordless

Beginner-Friendly

Glossy Finish
Cordless
Beginner-Friendly
Glossy Finish
Yes. The 3-in-1 formula skips the separate base and top coat steps, and the one-finger lamp keeps curing precise and simple. There's no button to remember — press once, wait 30 seconds, move to the next nail. Most first-timers get a clean result on their first attempt.
Up to 30 minutes of continuous use on a full charge — a standard 10-nail manicure with two coats uses around 10 minutes of lamp time, so one full charge typically covers a full mani and pedi, or two full manis. It charges in approximately 45 minutes via USB-C. The indicator light on top flashes while charging and stays solid when full. Charge it fully before first use.
With proper nail prep and application, gel manicures created with the Cordless Mini Kit can last up to 14 days without chipping. For the best results, start by pushing back and removing excess cuticles, then file and lightly buff your nails. Use the Prep Pads to remove oils, apply thin coats of gel polish, and seal the free edge of each nail. Before curing, make sure to clean any excess polish from the sides of the nails to help prevent lifting. For more details, you can watch our video tutorial here: Mani School.
Yes, our lamp and gels are travel-friendly! The lamp's lithium-ion battery is permitted in carry-on luggage on most airlines. We recommend keeping it out of checked bags and confirming with your airline before flying.
No - Unless if you want to. This kit is complete and contains everything you need for your first gel manis. You can add a pack of our Prep Pads and/or Remover Wraps to make sure you have enough for future manis, but this is optional as you already have enough to get you started in the kit. You can choose to add more colors or Nail Art tools if you are feeling creative.
Absolutely! The top of the lamp detaches and can be fixed in the opposite direction, creating extra space to comfortably cure your toes.