
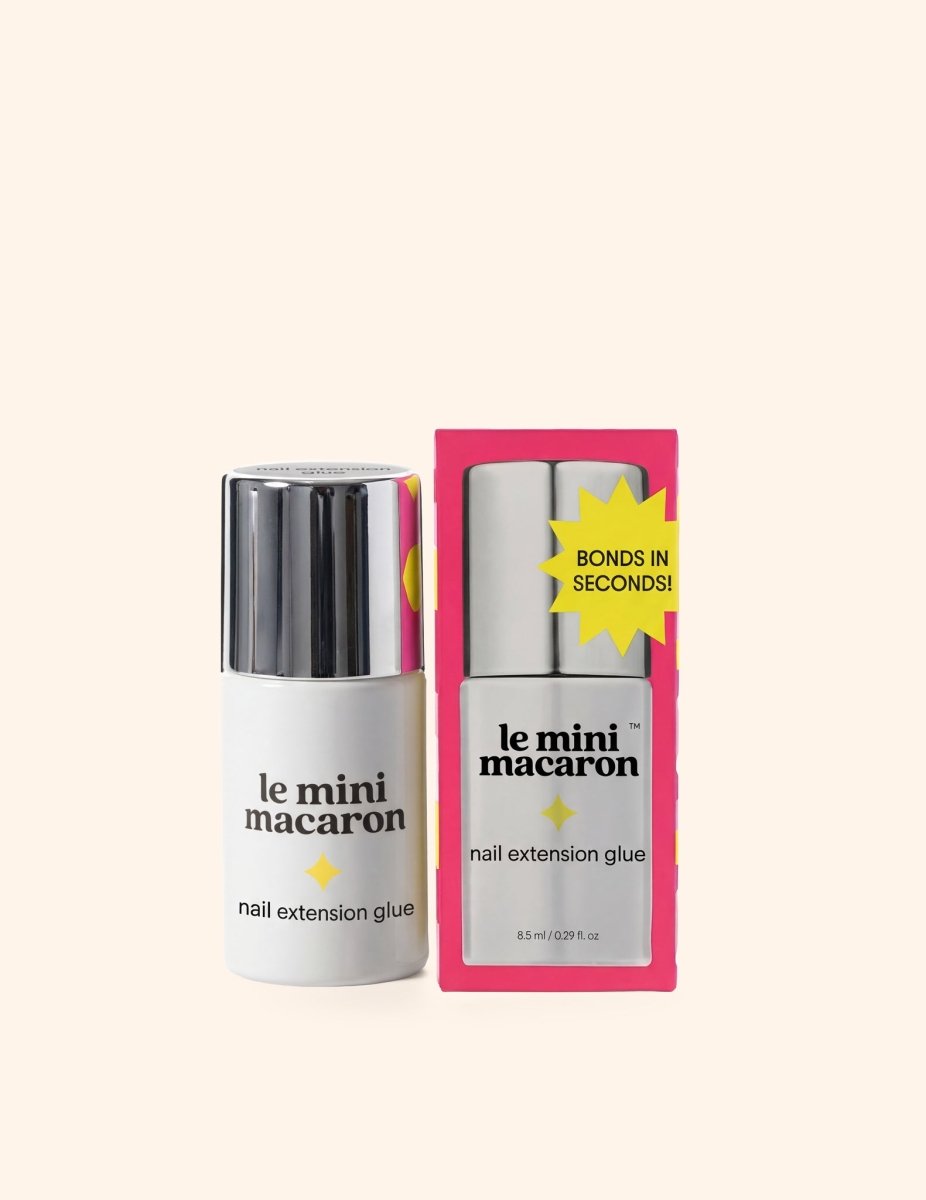

Nail Extension Glue
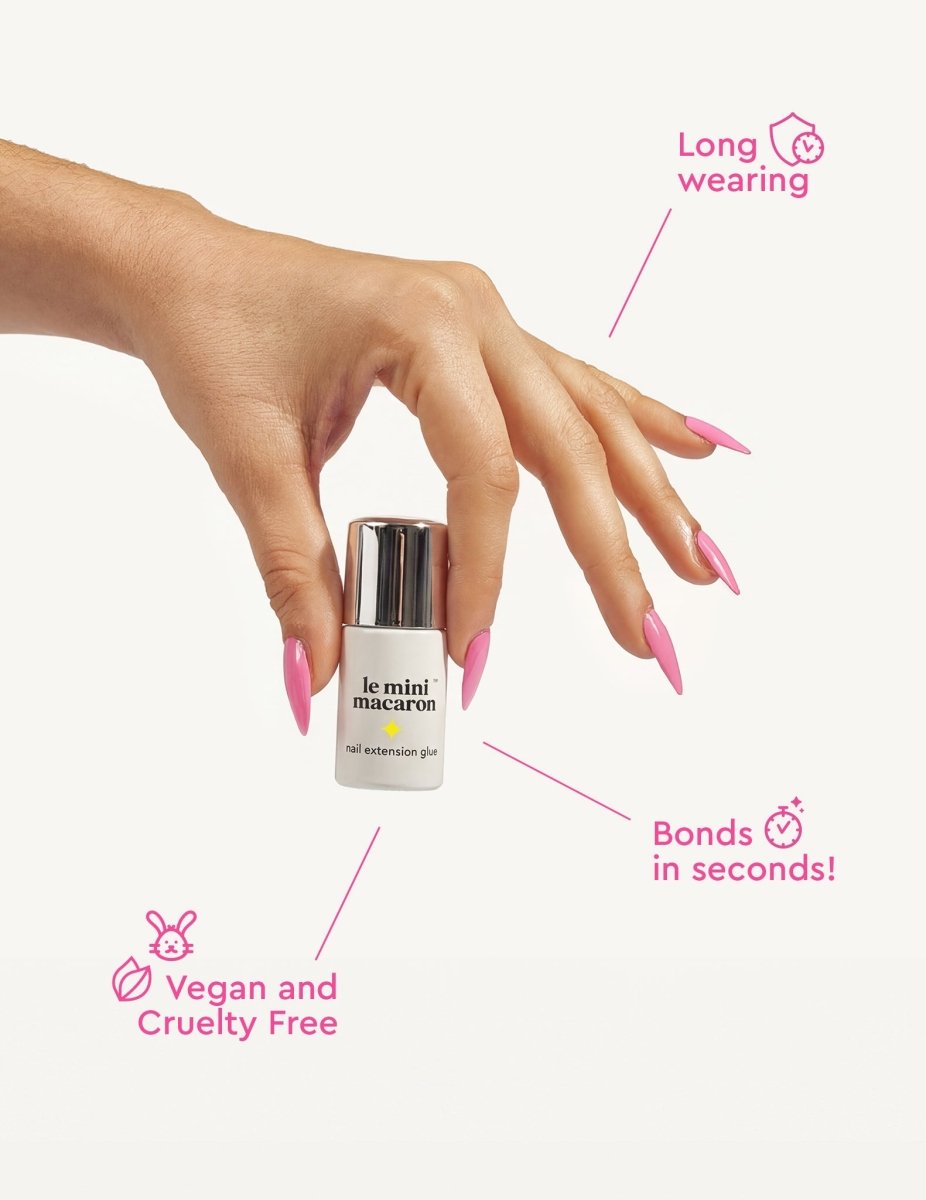
A strong, long-wear gel glue for nail extension tips. Fast-drying and easy to use, its slightly thick texture ensures precise dosage and controlled application.
This gel glue works best with LMM’s Soft Tips (sold separately) – a set of full, pre-shaped soft gel nails that you adhere to your natural nail and cure with an LED lamp (sold separately).
Choose options
Details
- A must-have glue for gel nail extension!
- Long-wear
- Bonds in seconds!
A strong, long-wear gel glue for nail extension tips. This fast-drying gel glue works best with LMM’s Le Gel Tip (sold separately) – a set of full, pre-shaped soft gel nails that you adhere to your natural nail and cure with an LED lamp (sold separately).
How to
Step1: SELECT YOUR LE GEL TIPS AND ADJUST THE LAMP
Set up all of your supplies. Choose the appropriate size Le Gel Tips for each of your natural nails. Make sure it covers the entire nail without any overhang. If you are between sizes, opt for the bigger size, then file to shape your nail bed once applied. Lay out the Le Gel Tips in the order you plan to apply them for easy access during the application process. Next, adjust the mini LED lamp by flipping the top around it or remove the tray for the maxi LED lamp to create more space for flash curing.
Pro tip: Remember to check each nail as nail sizes can vary between hands.
Step 2: PREP YOUR NAILS
For best results, trim your nails as short as possible. Use a cuticle pusher to gently push back your cuticles or cut your cuticles with a cuticle trimmer. Lightly buff the surface of your nails to remove any shine and create a slightly rough texture for better adhesion. Use Nail Cleanser Prep Pads to clean the dust and oil off your nails.
Step 3: APPLY LE GEL TIPS
Apply a thin layer of nail glue on the underside matte area of Le Gel Tip. Then, apply a second, slightly thicker layer of glue to the bottom half of the nail bed. Place the nail tip on your natural nail at a 45-degree angle. Start from the cuticle and gently press the tip down against your nail until it is completely covering the natural nail.
Pro tip: Do this step slowly and ensure that there are no air bubbles trapped underneath. If you do get air bubbles, remove the tip and start the process over with a new nail tip.
Step 4: CURE THE LE GEL TIPS
Once Le Gel Tips has been secured, immediately flash cure the nail for 5 to 10 seconds with the LED lamp. Release the nail tip and cure it for the full 30 seconds under Le Mini Macaron LED lamp or 60 seconds under Le Maxi Macaron LED lamp.
Repeat this process for each nail, working one nail at a time to ensure precision and accuracy.
Pro tip: You may experience a light, burning sensation when curing. That is normal. Flash-curing the nail about 3-4 inches from the LED light will help.
Step 5: SHAPE AND FILE
After applying and curing each nail, use a nail clipper and file to trim and shape the Le Gel Tips tips to your desired length and shape. Use a coarser file like Le Zebra and take your time to achieve the perfect shape and smooth out any rough edges for a flawless finish.
Pro tip: We recommend filing and shaping the nail after application as it is easier to apply the nail when it is longer.
*For professional use only.
You are now ready to paint your nails:
- File the edge and surface of your nails. We recommend using our Nail Cleanser Prep Pads to wipe away any dust and oils on the nails.
- Apply a VERY thin (barely there) layer of gel polish. Cure the nail immediately for 30 seconds. If your nail is still sticky, cure for an additional 15-30 seconds.
- Apply a second layer of gel polish and cure again.
- For full, opaque coverage, apply a third coat as thick as the second coat.
- Voila! Your manicure is complete!
Removal:
Step 1:
Use nail clippers or manicure scissors to trim down the tips of the gel nail extensions. Use a coarse nail file like Le Zebra to break the seal of the polish on the surface of Le Gel Tips. This will allow the acetone to penetrate more effectively. Use the file to buff away as much gel polish as possible.
Step 2:
Soak a cotton ball or pad in acetone and place it directly on top of each Le Gel Tip. Wrap each fingertip with aluminum foil to hold the cotton ball or pad in place and create a barrier to lock the acetone. Or you can use our Remover Pads which are pre-soaked with acetone for easy removal. Try our Remover Clips for an air-tight seal. Allow your nails to soak in the acetone for 10-15 minutes to soften the nail glue.
Step 3:
After soaking, gently press down on the foil-wrapped cotton ball or pad and twist to loosen and remove the nail tip. Use a cuticle stick or our Gel Polish Remover Tool to gently lift off any remaining residue from your natural nails. Be patient and avoid forcing or prying the Le Gel Tips off, as this can damage your natural nails.
Step 4:
Once all nails are removed, wash your hands thoroughly with soap and water to remove any remaining acetone residue. Apply cuticle oil to nourish and hydrate your nails and cuticles.
Want more? You can find more pro tips and inspo on our blog.
We recommend taking a two-week break between applications and allowing your natural nails to breathe and recover.
Shipping
What Are The Standard Delivery Fees And Times?
Currently, we offer shipping to Spain, France, Germany, the Netherlands, Austria, Italy, Belgium, Portugal, Ireland, Slovenia, Luxembourg, Latvia, Poland, Bulgaria, Estonia, Lithuania, the United Kingdom, Guadeloupe, Martinique, and Réunion. If your country is not on our list, feel free to contact us to see how you can purchase our product locally.
Please be aware that during busy periods such as holiday seasons, Black Friday, as well as sales and promotions, there may be delivery delays of additional business days, as shipping companies require more time. Your understanding is greatly appreciated.

Standard Shipping Times and Costs
Temporary promotion: free shipping on orders over €34 in Italy and €24 in Spain (mainland and Balearic Islands). Offer valid for a limited time.
We charge a flat rate for shipping, as follows:
- €2.95 for Spain (mainland and Balearic Islands only. Please note that the Canary Islands are excluded from our shipping service).
- €4.95 for Italy, France, Belgium and Portugal.
- £4.95 for the United Kingdom on orders under £45.
- €7 for Germany and the Netherlands.
- €10 for Ireland, Austria, Poland, Luxembourg, Slovenia, Estonia, Latvia and Lithuania.
- €20 for Bulgaria.
- €10 for Guadeloupe, Martinique and Réunion.
Free Shipping
- Spain: Free shipping on orders over €24 (mainland and Balearic Islands).
- Italy: Free shipping on orders over €34.
- France, Belgium, Portugal, Germany, the Netherlands, Austria, Poland, Luxembourg, Slovenia, Estonia, Latvia, Lithuania and Ireland: Free shipping on orders over €49.
- Bulgaria: Free shipping on orders over €59.
- United Kingdom: Free shipping on orders over £45.
- Guadeloupe, Martinique and Réunion: Free shipping on orders over €70.
Free shipping totals must be reached after the application of discount codes and/or Gift Cards. Certain restrictions may apply.
Delivery Times
SPAIN
Order preparation takes 1 business day, and delivery typically takes an additional 2–3 business days. Most orders arrive within 3–4 business days from the date of purchase.
ITALY
Order preparation takes 1 business day, and delivery typically takes an additional 2–3 business days. Most orders arrive within 3–4 business days from the date of purchase.
REST OF EUROPE
Order preparation takes 1 business day, and delivery typically takes an additional 3–4 business days. Most orders arrive within 4–5 business days from the date of purchase.
UNITED KINGDOM
Order preparation takes 1 business day, and delivery typically takes an additional 7–8 business days. Most orders arrive within 8–9 business days from the date of purchase.
Please note: to facilitate delivery, we offer collection points in the following countries: Italy, France, Spain, the Netherlands, Belgium, and Germany.
Customs & Import Fees
Customers from countries outside the European Union may be required to pay taxes and duties on their orders.
When goods are imported into another country or customs territory, local customs authorities may apply customs duties or import fees. If such charges apply, the customer is responsible for paying them directly to the relevant authorities. Whether customs duties are payable — and the amount charged — depends on your country’s specific regulations.
If customs duties are required, the amount is typically calculated based on the value and type of goods being imported.
If you choose to refuse the customs fee, your parcel will be returned to Le Mini Macaron. Once received, we will process your refund. Please note that, in some cases, a customs handling fee may be deducted from the refunded amount.
If you are unsure whether your order may be subject to customs fees, we recommend contacting your local customs office before placing your order.
Shipping
What Are The Standard Delivery Fees And Times?
Currently, we offer shipping to Spain, France, Germany, the Netherlands, Austria, Italy, Belgium, Portugal, Ireland, Slovenia, Luxembourg, Latvia, Poland, Bulgaria, Estonia, Lithuania, the United Kingdom, Guadeloupe, Martinique, and Réunion. If your country is not on our list, feel free to contact us to see how you can purchase our product locally.
Please be aware that during busy periods such as holiday seasons, Black Friday, as well as sales and promotions, there may be delivery delays of additional business days, as shipping companies require more time. Your understanding is greatly appreciated.
Standard Shipping Times and Costs
Temporary promotion: free shipping on orders over €34 in Italy and €24 in Spain (mainland and Balearic Islands). Offer valid for a limited time.
We charge a flat rate for shipping, as follows:
- €2.95 for Spain (mainland and Balearic Islands only. Please note that the Canary Islands are excluded from our shipping service).
- €4.95 for Italy, France, Belgium and Portugal.
- £4.95 for the United Kingdom on orders under £45.
- €7 for Germany and the Netherlands.
- €10 for Ireland, Austria, Poland, Luxembourg, Slovenia, Estonia, Latvia and Lithuania.
- €20 for Bulgaria.
- €10 for Guadeloupe, Martinique and Réunion.
Free Shipping
- Spain: Free shipping on orders over €24 (mainland and Balearic Islands).
- Italy: Free shipping on orders over €34.
- France, Belgium, Portugal, Germany, the Netherlands, Austria, Poland, Luxembourg, Slovenia, Estonia, Latvia, Lithuania and Ireland: Free shipping on orders over €49.
- Bulgaria: Free shipping on orders over €59.
- United Kingdom: Free shipping on orders over £45.
- Guadeloupe, Martinique and Réunion: Free shipping on orders over €70.
Free shipping totals must be reached after the application of discount codes and/or Gift Cards. Certain restrictions may apply.
Delivery Times
SPAIN
Order preparation takes 1 business day, and delivery typically takes an additional 2–3 business days. Most orders arrive within 3–4 business days from the date of purchase.
ITALY
Order preparation takes 1 business day, and delivery typically takes an additional 2–3 business days. Most orders arrive within 3–4 business days from the date of purchase.
REST OF EUROPE
Order preparation takes 1 business day, and delivery typically takes an additional 3–4 business days. Most orders arrive within 4–5 business days from the date of purchase.
UNITED KINGDOM
Order preparation takes 1 business day, and delivery typically takes an additional 7–8 business days. Most orders arrive within 8–9 business days from the date of purchase.
Please note: to facilitate delivery, we offer collection points in the following countries: Italy, France, Spain, the Netherlands, Belgium, and Germany.
Customs & Import Fees
Customers from countries outside the European Union may be required to pay taxes and duties on their orders.
When goods are imported into another country or customs territory, local customs authorities may apply customs duties or import fees. If such charges apply, the customer is responsible for paying them directly to the relevant authorities. Whether customs duties are payable — and the amount charged — depends on your country’s specific regulations.
If customs duties are required, the amount is typically calculated based on the value and type of goods being imported.
If you choose to refuse the customs fee, your parcel will be returned to Le Mini Macaron. Once received, we will process your refund. Please note that, in some cases, a customs handling fee may be deducted from the refunded amount.
If you are unsure whether your order may be subject to customs fees, we recommend contacting your local customs office before placing your order.